Step 3
The Middle Layer Complete
So 4 Edges need to take their place next to their four centers that are permanent
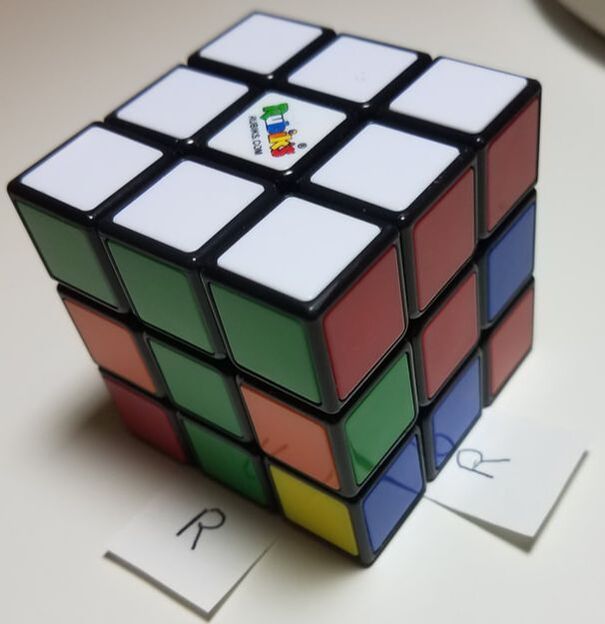
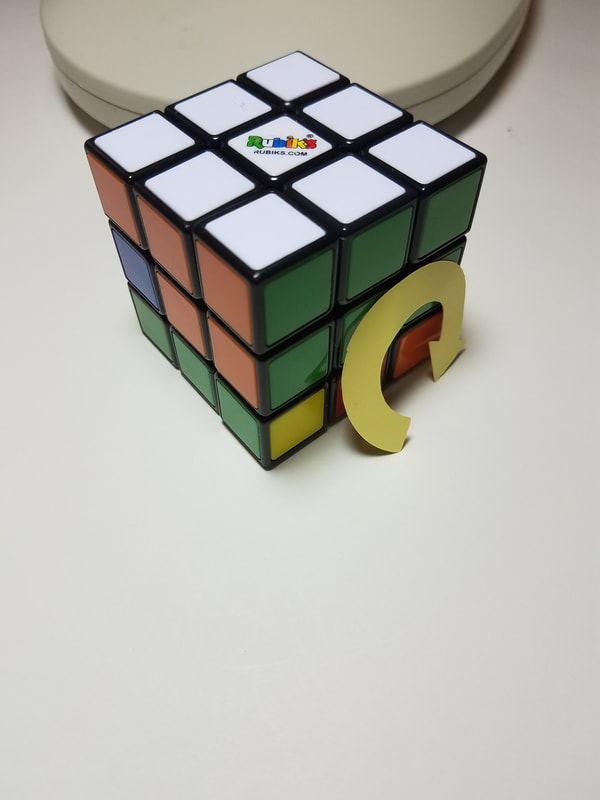
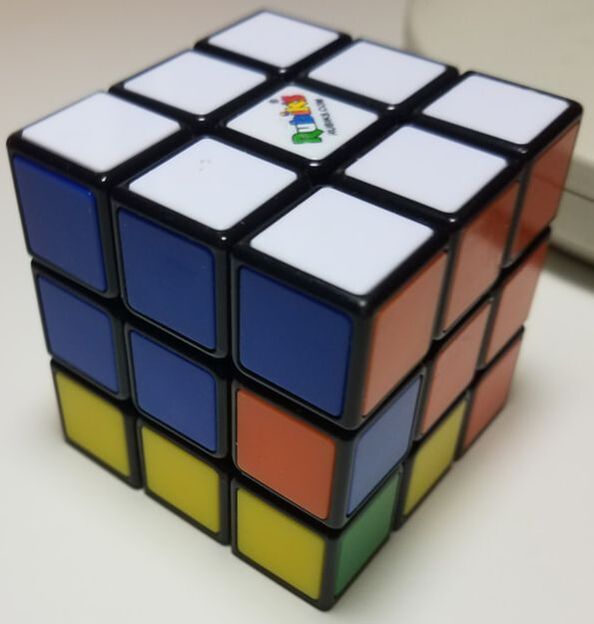
Study the photo below. To complete the middle layer edges:
Step 3
1). Keep the White center facing up
2). Look first for an edge on the bottom layer with no yellow on it. (note photo that we have two blue/red & green/red)
3). turn bottom layer either direction until a non-yellow bottom layer edge matches the center face color above it
(note in photo that our green/red edge is already in place so we'll place the green/edge where it belongs in the middle layer first)
4). now Step 3 has two cases:
Case Right: if the bottom color on the edge needs to go to the right middle layer to match its color
Formula for Step 3R is: (63)'(63) (BR)' (BR)
(61)(61)' (BF) (BF)'
or written out the long way 6' 3' 6 3 6 1 6' 1' OR B' R' B R B F B' F' continue below with photos of the 8 turns
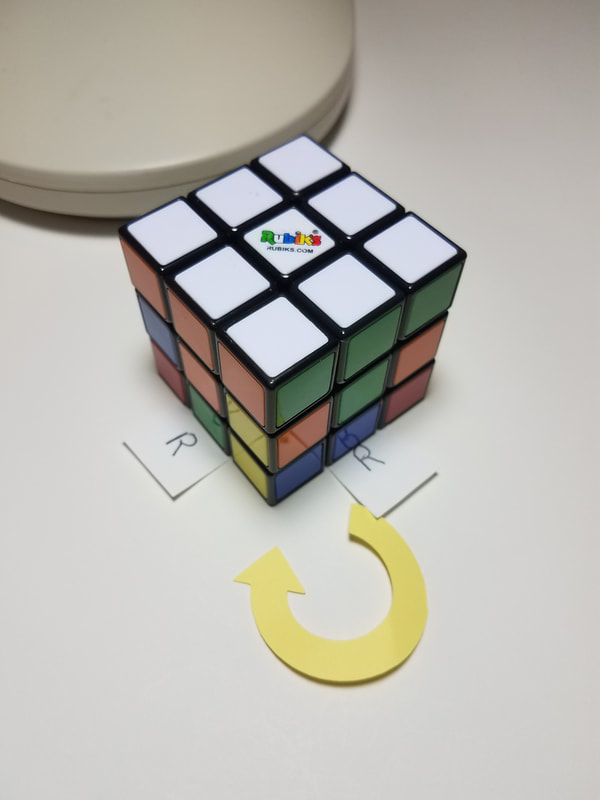
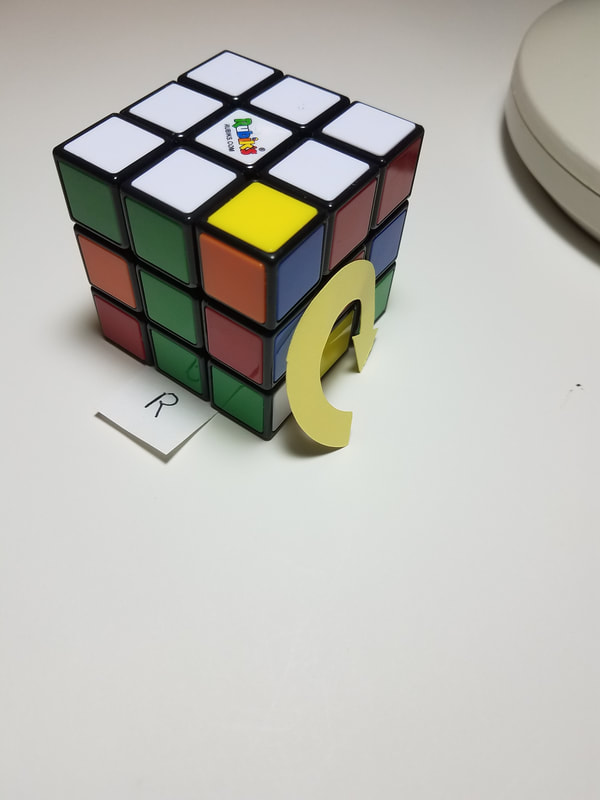
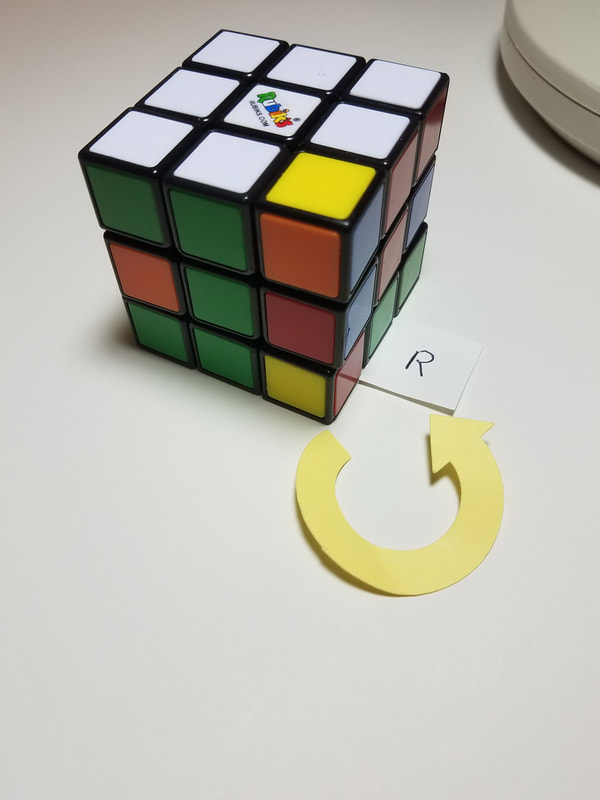
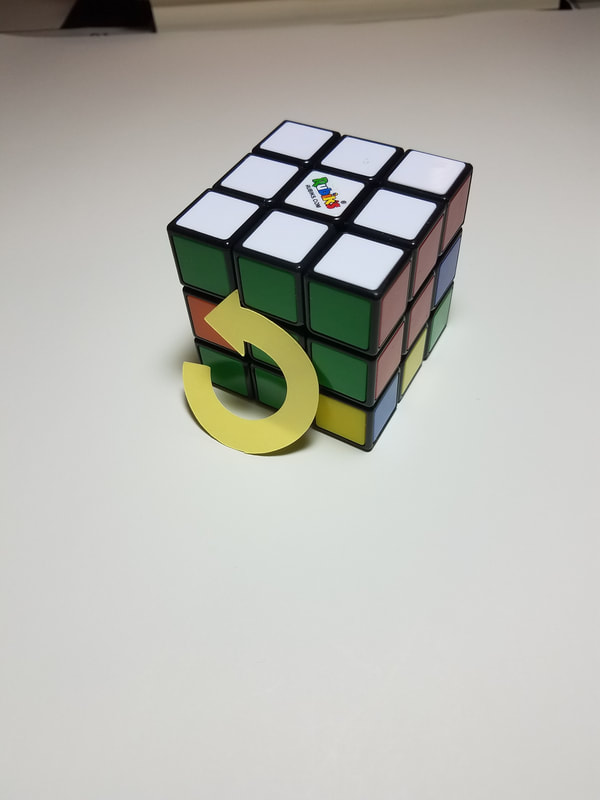
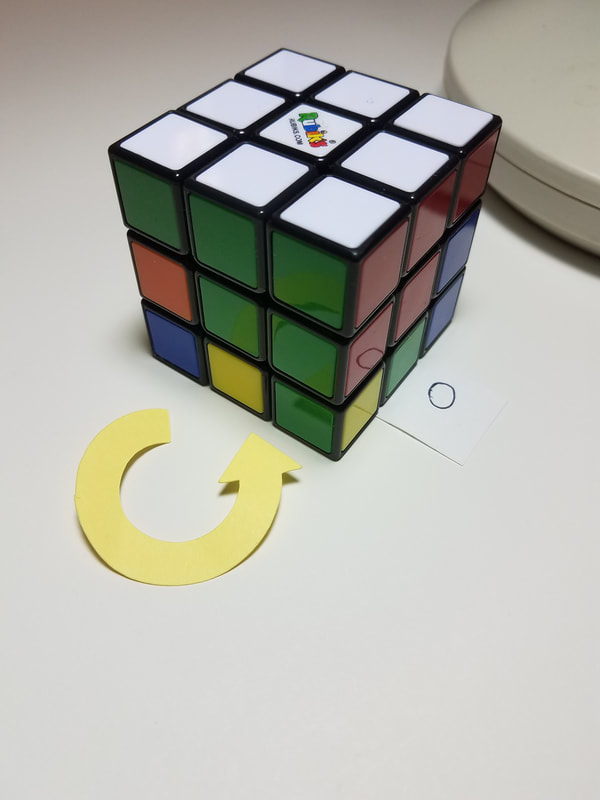
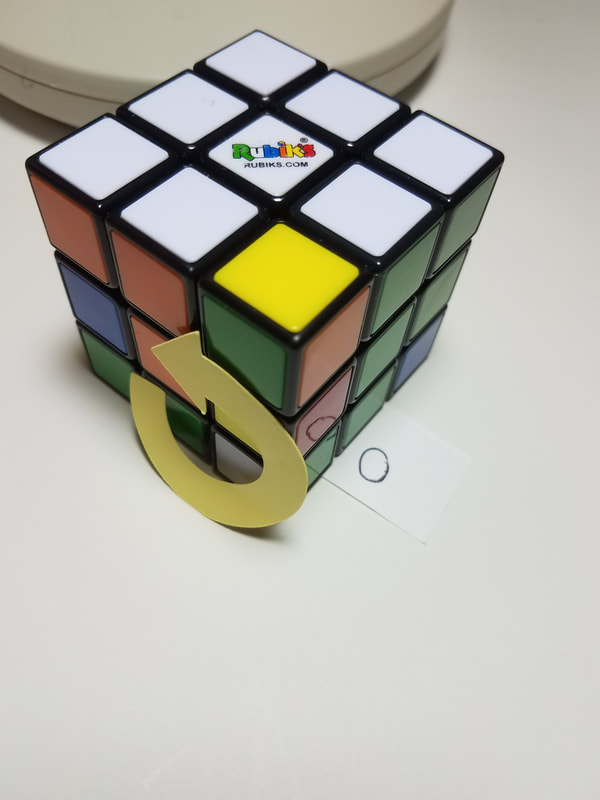
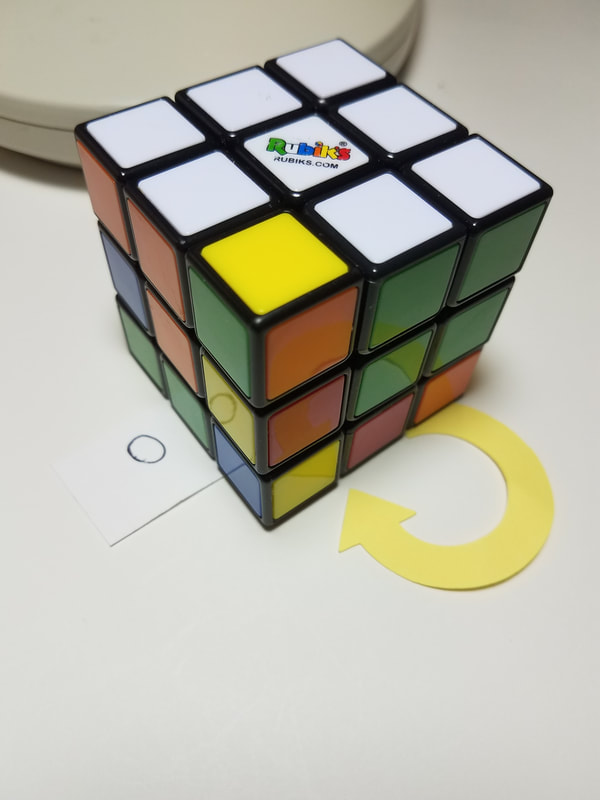
Step 3R turns 1 and 2 Side Note: follow the green/red edge through each turn if you wish
upper left photo shows 6' or B' (so now our green/red edge went from under the front green center to the opposite side it needs to go in order to temporarily get it out of the way as now it is on the left side instead of the front side)
upper right photo shows 3' or R' (the middle edge place our green/red edge needs to go in is put in place on the bottom layer. Side Note: I turned the whole cube some so the front face is on the left side and and our left side with our green/edge cannot be seen as it is in the back) Continue below with turns 3 & 4 out of 8 turns
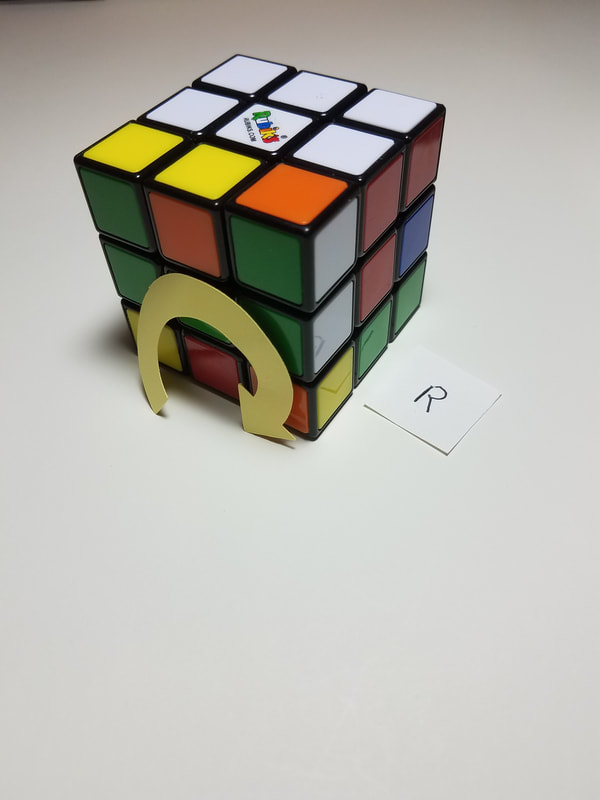
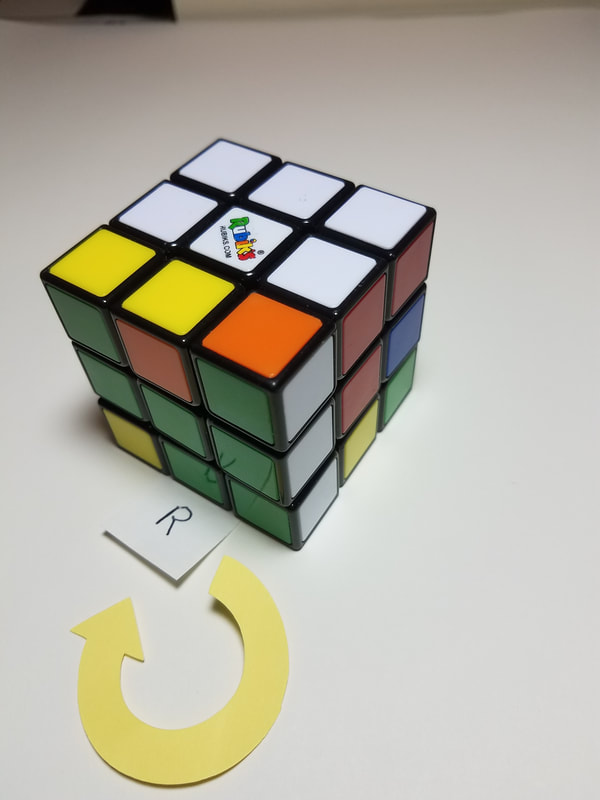
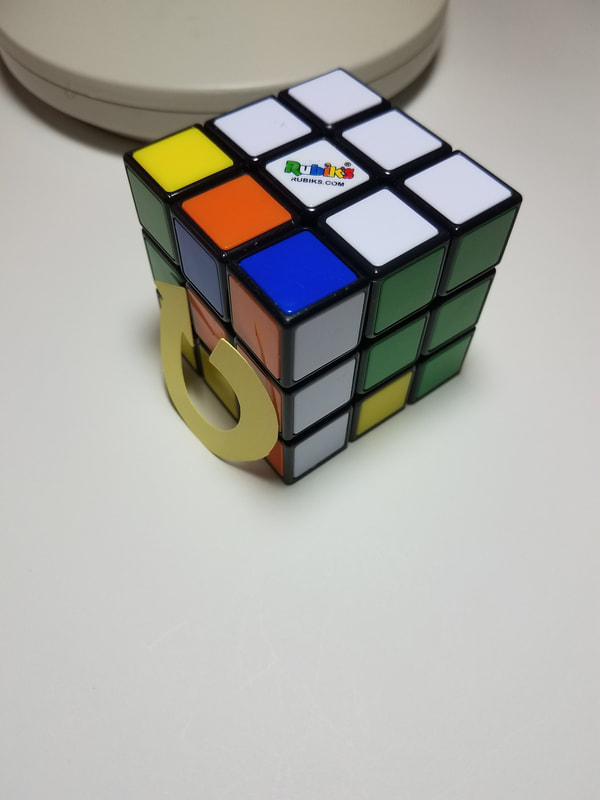
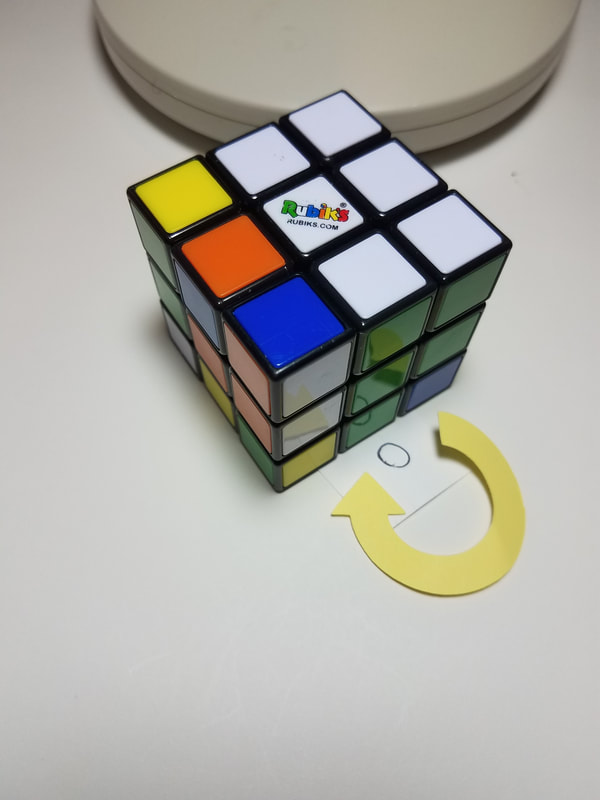
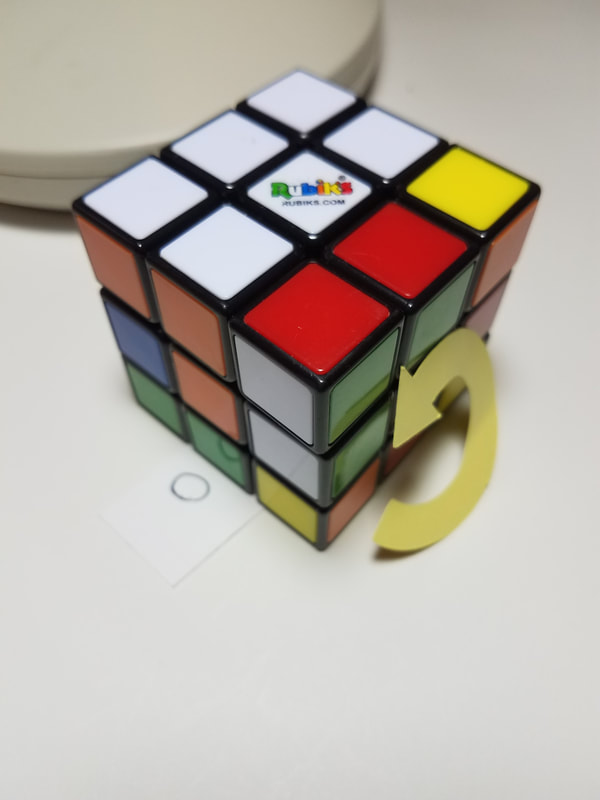
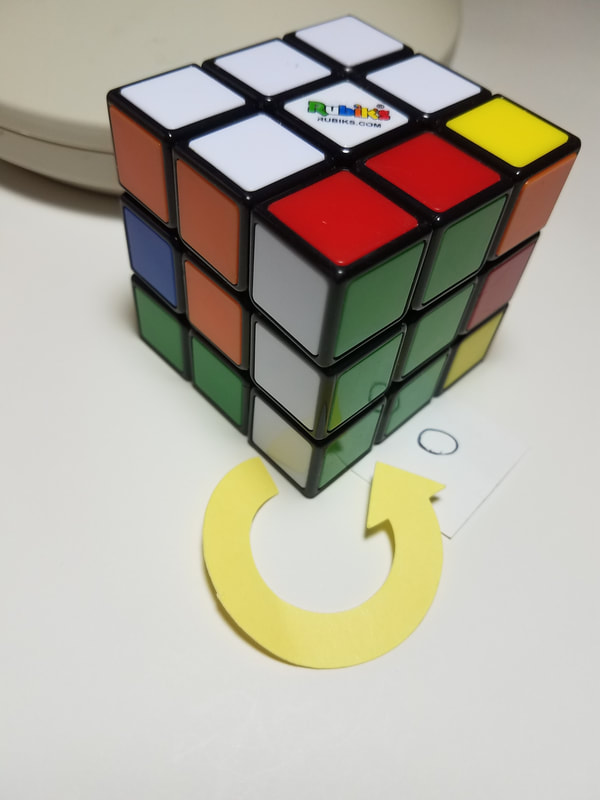
Step 3R turns 3 and 4 out of 8 turns shown below
upper left photo shows the 3rd turn which is 6 or B (moved our green/red edge back to the front side)
upper right photo shows the 4th turn which is 3 or R (returned our two white pieces to the top face) Continue below
upper left photo shows the 3rd turn which is 6 or B (moved our green/red edge back to the front side)
upper right photo shows the 4th turn which is 3 or R (returned our two white pieces to the top face) Continue below
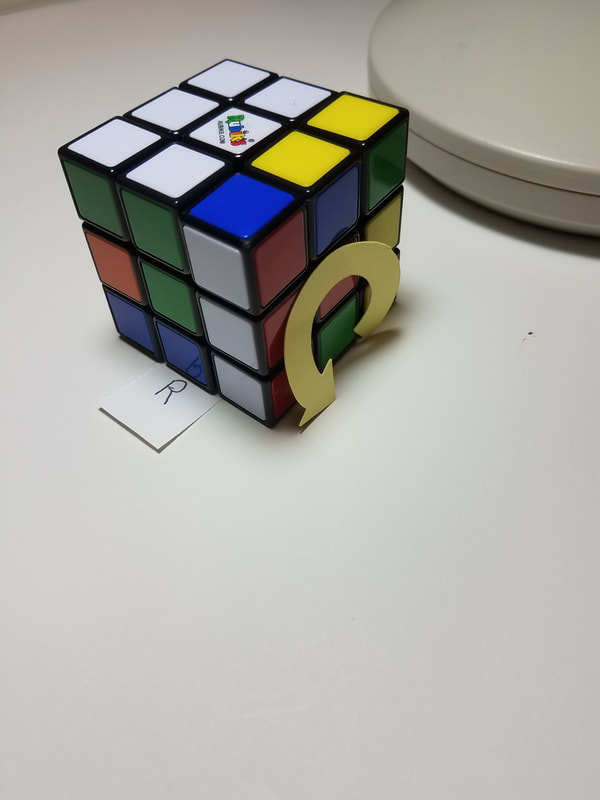
Step 3R turns 5 and 6 of 8 turns
upper left photo shows the 5th turn 6 or B (moves our green/red edge to the right side)
upper right photo shows the 6th turn 1 or R (moves the non white top corner down so we can return its corner and place our green/red edge where it belongs on the next turn) Continue below.
upper left photo shows the 5th turn 6 or B (moves our green/red edge to the right side)
upper right photo shows the 6th turn 1 or R (moves the non white top corner down so we can return its corner and place our green/red edge where it belongs on the next turn) Continue below.
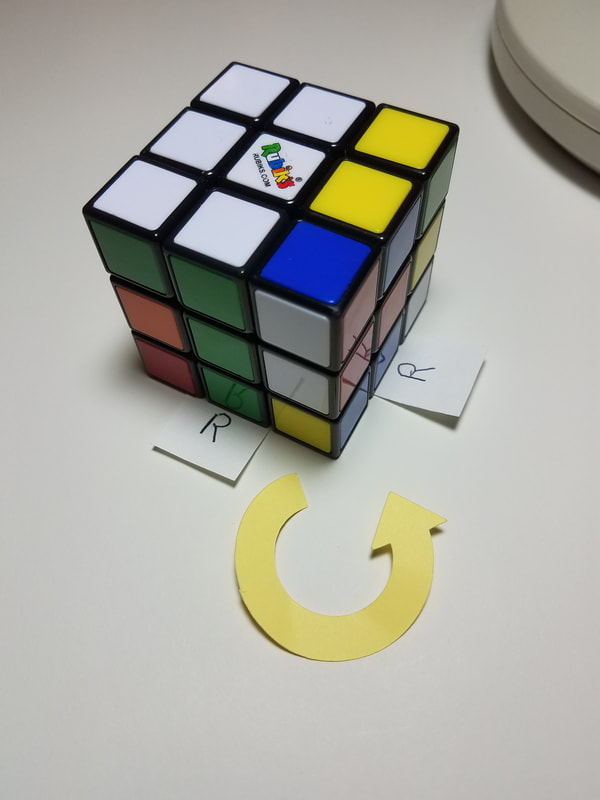
Step 3R the 7th and 8th final turns
upper left photo shows the 7th turn 6' or B' (returns the white corner and places our green/red edge where it belongs next to the green center and the red center on the bottom layer that you cannot see)
upper right photo shows the 8th and final turn 1' or F' (brings the white layer back to the top taking our green/red edge into the middle layer where it belongs.)
Side Note: You really don't need to be a mechanic to drive a car nor do you have to follow the green/red edge through all eight turns and understand them...all you need to do is to memorize that once you have an edge on the bottom layer next to the color that matches its center and the bottom color on that edge needs to go to the right middle edge position just do the formula (63)' (63) (61) (61)' and your edge will magically end up where it belongs.
I've done this 3rd step so often that I don't even know the numbers formula anymore as my mind just does these eight turns without even thinking about them. I just remember my first turn is the bottom layer the opposite direction that my edge needs to go and the rest is automatic. You realize all repetitive things are this way in life, for example, when I coached wrestling or football I'll tell the player that it's too late to think about a move in a match/game as you need to make the move so often in practice and in your mind before the match/game that the move is automatic when you need it in the match/game. Now let us do the Step 3 Left case below.
I've done this 3rd step so often that I don't even know the numbers formula anymore as my mind just does these eight turns without even thinking about them. I just remember my first turn is the bottom layer the opposite direction that my edge needs to go and the rest is automatic. You realize all repetitive things are this way in life, for example, when I coached wrestling or football I'll tell the player that it's too late to think about a move in a match/game as you need to make the move so often in practice and in your mind before the match/game that the move is automatic when you need it in the match/game. Now let us do the Step 3 Left case below.
Step 3 Left Case
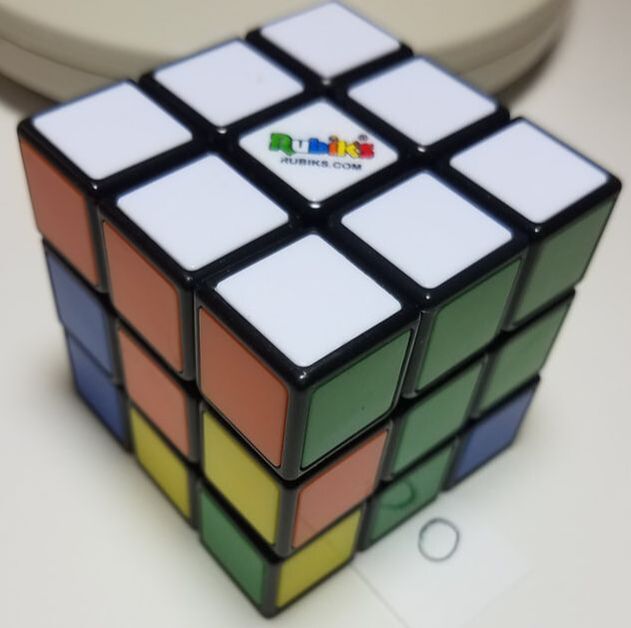
Note in the photo below that the bottom layer green/orange edge needs to go to the middle left side.
Formula for Step 3 Left Side Edge Placement
(64) (64)' or (BL) (BL)'
(61)' (61) or (BF)' (BF)
in long form 6 4 6' 4' or B L B' L'
6' 1' 6 1 or B' F' B F photos of each of the Step 3L eight cases below (two at a time again)
Formula for Step 3 Left Side Edge Placement
(64) (64)' or (BL) (BL)'
(61)' (61) or (BF)' (BF)
in long form 6 4 6' 4' or B L B' L'
6' 1' 6 1 or B' F' B F photos of each of the Step 3L eight cases below (two at a time again)
Step 3L
upper left photo below shows Step 3L 1st turn 6 or B (moves our green/orange edge off to the right side)
upper right photo shows Step 3L 2nd turn 4 or L Continued below.
upper left photo below shows Step 3L 1st turn 6 or B (moves our green/orange edge off to the right side)
upper right photo shows Step 3L 2nd turn 4 or L Continued below.
Step 3L case turns 3 and 4 of 8 turns
upper left photo below shows 3rd turn 6' or B'
upper right photo shows 4th turn 4' or L' Continued below
upper left photo below shows 3rd turn 6' or B'
upper right photo shows 4th turn 4' or L' Continued below
Step 3L turns 5 and 6 of 8 turns
upper left photo below shows Step 3L 5th turn 6' or B'
upper right photo shows Step 3L 6th turn 1' or F' continued below
upper left photo below shows Step 3L 5th turn 6' or B'
upper right photo shows Step 3L 6th turn 1' or F' continued below
Step 3L the final two turns in the formula (64) (64)' (61)' (61)
upper left photo below shows Step 3L 7th turn 6 or B
upper right photo shows Step 3L 8th and final turn 1 or F (note our green/orange edge is in middle layer where it belongs) Success.
upper left photo below shows Step 3L 7th turn 6 or B
upper right photo shows Step 3L 8th and final turn 1 or F (note our green/orange edge is in middle layer where it belongs) Success.
Note the photo below as sometimes all the edges on the bottom layer have yellow on them and the middle is NOT finished yet. That means there is still an edge in the middle layer but not correct in some way. Note below the orange/blue edge is in the middle layer but needs to be turned. So now you can either hold the cube so that edge is to your right and use Step 3R to bring it to the bottom layer or hold the cube so the orange/blue edge is to your left and use the Step 3L to move that edge from the middle layer to the bottom layer.
Then of course you have to do Step 3R or 3L to return it to the middle layer but correctly turned.
When I started this middle layer, there were two non-yellow edges on the bottom layer and two in the middle layer but as I placed the ones from the bottom layer into the middle layer, that process automatically swapped one of the middle edges to the bottom layer as the correct edge from the bottom layer took it's place. That's why you do all the bottom edges to the middle layer first as it's time consuming to move a middle layer edge to the bottom layer if you don't need to do it. That concludes Step 3, onto steps 4-7.
Side Note: So far the top layer took Step 1 with two cases and Step 2 with three cases (5 cases total)
the middle layer had Step 3 with two cases 3R and 3L (2 cases total)
the final layer will have four Steps 4-7 but each of these steps will only have one case BUT the one formula for each of Steps 4-7 may have to be used three or more times as each time you do the formula brings that step closer to done.
