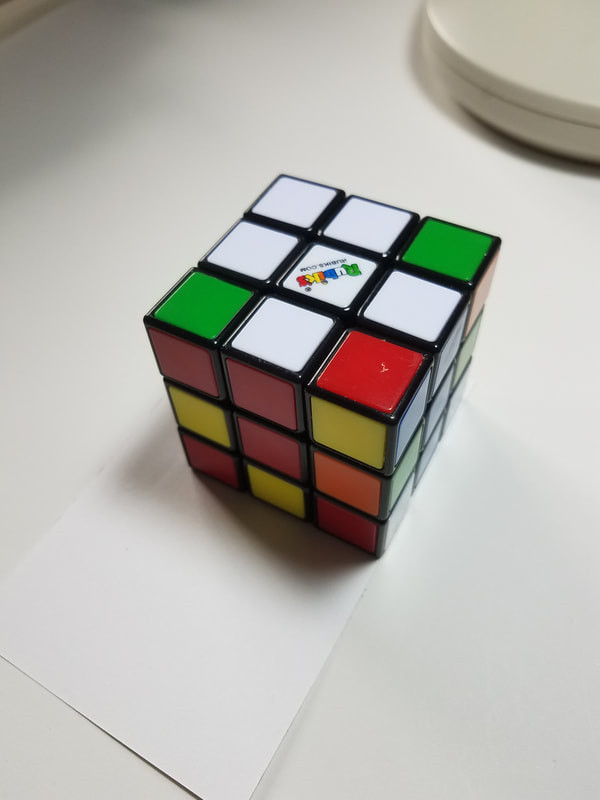
Photos to show each step as the solution is explained
, 1. Mess Up Cube First 2. Step 1 Goal 3. Note, not only White Cross on top
Note: the white center is on top for White Cross on Top but the second color on each white
the first two steps so yellow edge have to match their centers
center is on bottom and the also. Note orange/orange,
green center is opposite blue green/green and the not shown
and the red center opposite orange center. red/red match and blue/blue match.
Step 1
The short explanation (big picture) is:
1. Holding the cube with the white center facing up
2. Locate an edge with white on it. If the white/? edge is on the top you may be able to just turn the top to place this white/? edge where it belongs for the first one done, if not, continue to step 3 for the other three white/? edges or all four of them.
3. Find a white edge in the center layer or on the bottom layer then turn any face any which way (1/F, 1'/F', 3/R, 3'/R', 4/L, 4'/L') to get that chosen white/? edge on the bottom layer unless it's already there.
4. Then turn the bottom layer until the white/? color is directly under the place on the top layer where it belongs (under the center color that matches the non-white color). As you look at the cube, the front face (it does matter which face you consider the front face, in order for the formulas to work and the front face changes throughout the solution) should have the white edge you wish to place currently on the bottom layer, the center color matching the second color on your white edge and the spot on the top layer where your edge belongs.
5. Now holding the cube so the white center is still on top and the white/? edge is facing you (on the front face); one of only two possibilities exists:
[1] The color is adjacent (next to) to it's center color and the white is on the bottom of that edge for which you only have to do 1 and 1 again OR F and F a second time to place that edge where it belongs on top. [Turn the front face 90 degrees either direction twice or 180 degrees]
[2] The white is adjacent to the center non-white (red, orange, blue or green) center and the non-white color is on the bottom at which you 6 or B then 3 or R and finally 1' or F' to place the white/? edge where it belongs. [turn the bottom layer so the white/? edge is to your right side then spin the right side 90 degrees so now the ? color is matching its center color and is to the right of the center color and finally spin the front face counterclockwise to place the white/? edge on the top where it belongs]
6. Now you repeat steps 1-5 for the other three white edges to complete the white cross on top being careful not to lose any white edge that you've already placed in it's proper place as sometimes you have to temporarily get a white edge out of place at which point you just remember to return it after you get the new white edge in place.
Side Note: For Steps 1 & 2, once you catch on to doing them a few dozen times, they become common sense and you actually understand why they work and will not need formulas for them like you do for steps 3-7 which you'll learn to memorize the formulas (in numeric and/or letter form) for and using the formulas for steps 3-7 will slowly become steps of faith or trust that when you do this formula for this step what you need accomplished will happen magically.
OK Alisson, I'll mess the cube up now and do step 1 on it, step by step, like explained above so you have a visual of what to do. Your messed up cube will NOT look exactly like my messed up cube so just follow these diagrams till you catch on and then attempt doing the same on your cube. Keep studying the below diagrams and trying the procedure with your cube until you catch on AND then practice Step 1 Over and over and over and over .... again and again until you have Step 1 The White Cross down pat and committed to memory from repetition.
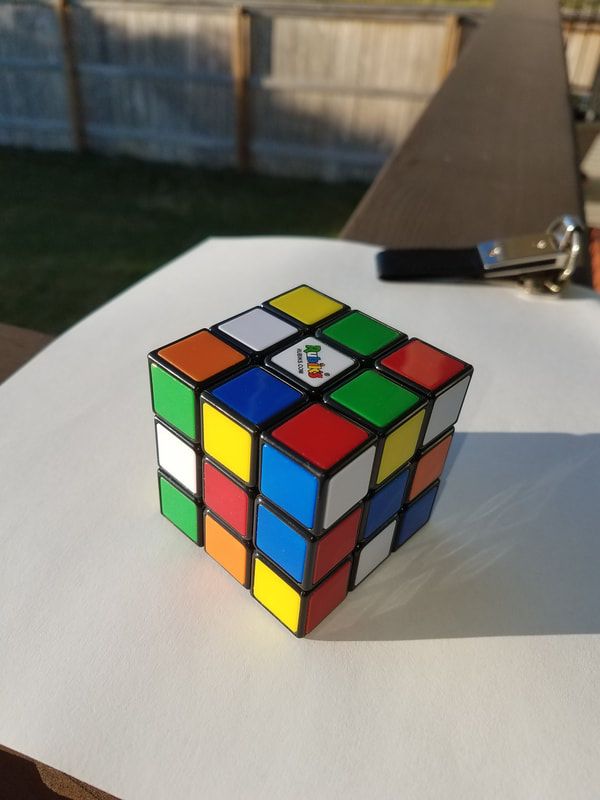
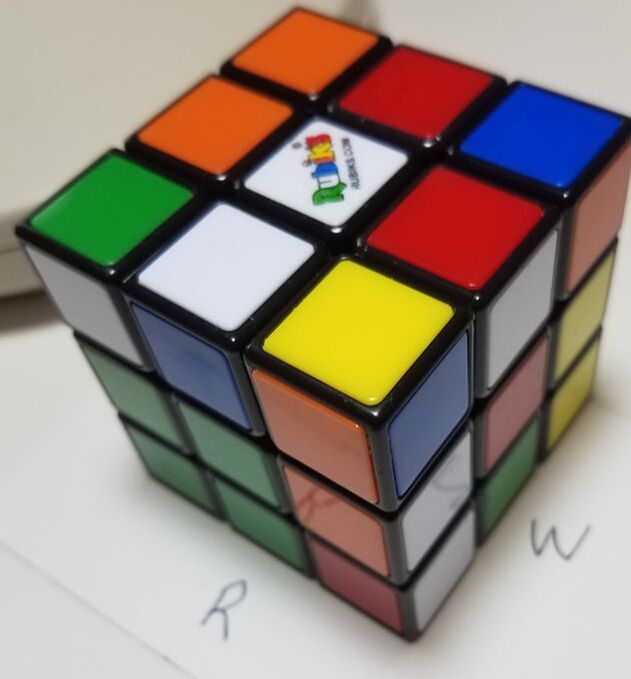
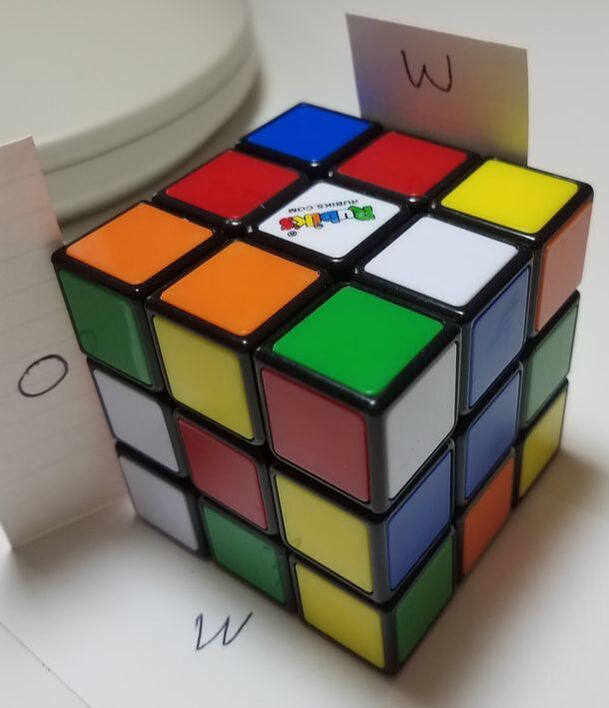
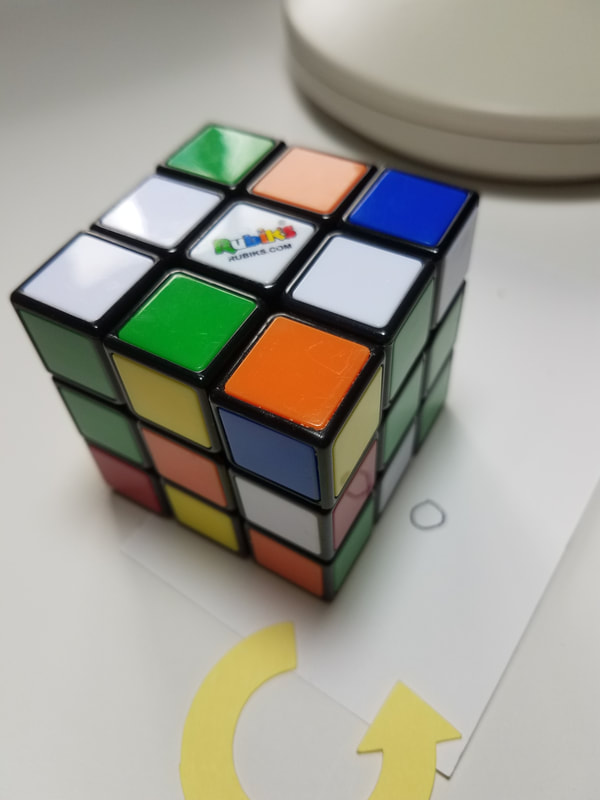
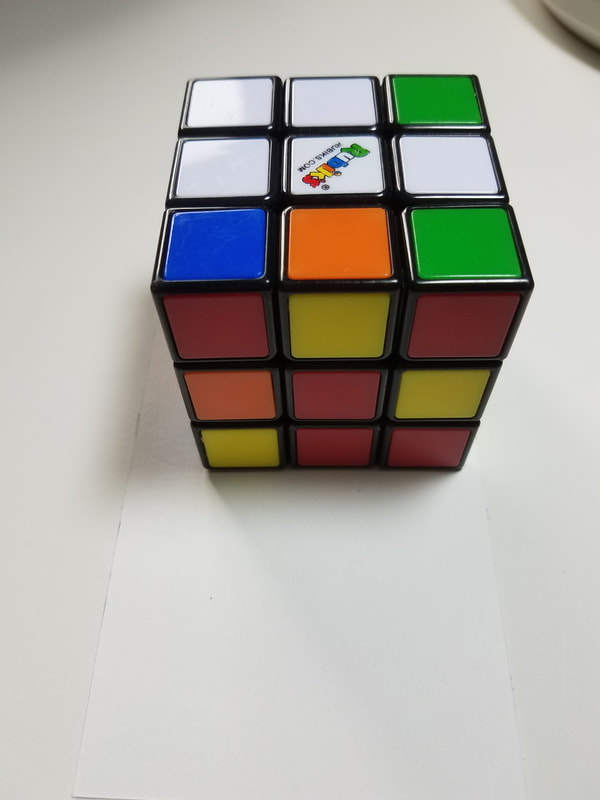
Alisson, the photo below is how my cube ended up after messing it up for awhile by turning faces randomly until it was sufficiently messed up.
Side Note: I wish I could make a single photo smaller so you could see the words above it at the same time you see the photo below the words but I haven't figured out how to do reduce there size so you may have to take notes then scroll down to the photo and look at your notes. Sorry.
Look for all the white edges we need to place on the top white face, to make the white cross shape
(our goal for step 1).
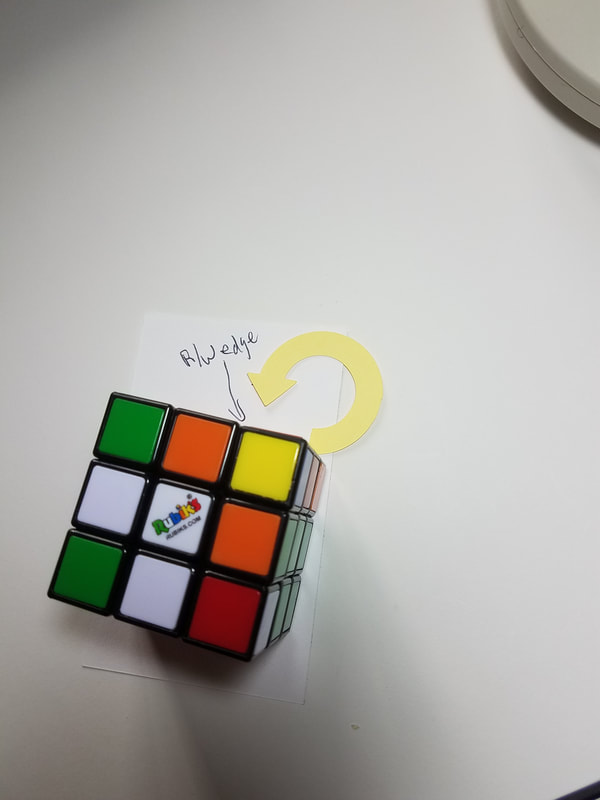
white edges 1 & 2) there is a white/blue edge in the top layer and a red/white edge on the top layer.
white edge 3) there's a white/orange edge in the middle layer
and white edge 4) I wrote an R by that green edge on the bottom as it's green/red and a W on the paper by that other green edge as it is our fourth and final white edge being the green/white edge that we need in place, on the top face, to make the white cross on top.
Alisson, you can pick any one of the four white edges to start with and the rules for timing a person solving the Rubik's Cube gives the person a certain amount of time to plan their strategy before the clock starts.
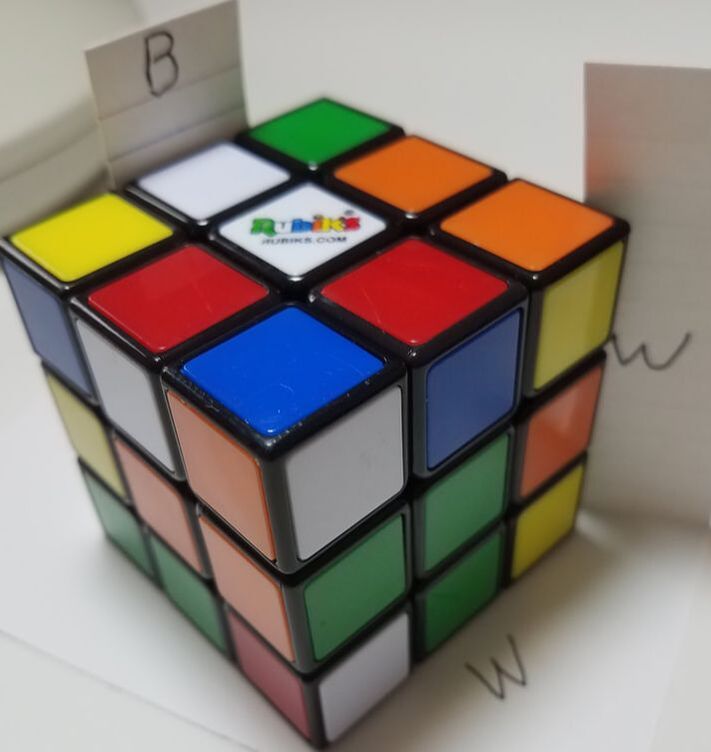
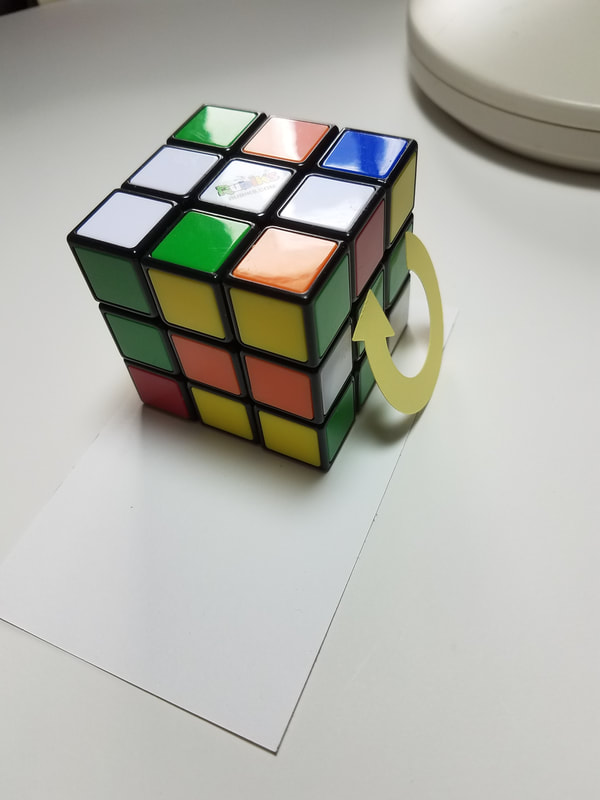
Let us start with that white/blue one on top as my strategy for the white/blue edge is just to turn the top (#5 or T) 180 degrees or 55 (TT) as I know that the blue center (that you cannot see in this photo) is opposite the green center that you can see.
Side Note that helps me remember which colors are opposite each other on the cube: In the colors of the rainbow (ROY G BIV) that make up white light note that the RO or Red Orange start out the name ROY and the Red Center is opposite the Orange Center. Also note, that in ROY G BIV, the G and B are adjacent (his middle initial and the first letter of his last name BIV) and the Green center is always opposite the Blue center. Since the White center is always on the top layer for Steps 1 & 2 making the Yellow center is on the bottom and then for Steps 3-7 you flip the cube over so the Yellow center is on the Top face leaving the White center on the bottom face as you finish solving the Cube thus since White & Yellow are always on Top or Bottom for all 7 steps thus you only really need to memorize that the Red & Orange centers are opposite faces and Green & Blue centers are opposite faces to know ahead of time where those centers are if they are hidden from you at the time which speeds up solving the cube as you don't have to look for them as you know where they are there even if you cannot see them at the time.
OK, I'll turn the top 180 degrees placing the white/blue edge where it belongs and I'll take another photo to see where we are at. Skip to next photo down and study it with me. (The photo under the one below.)
YES, we have the white/blue edge in place. One white edge in place, 3 white edges to go to complete step 1.
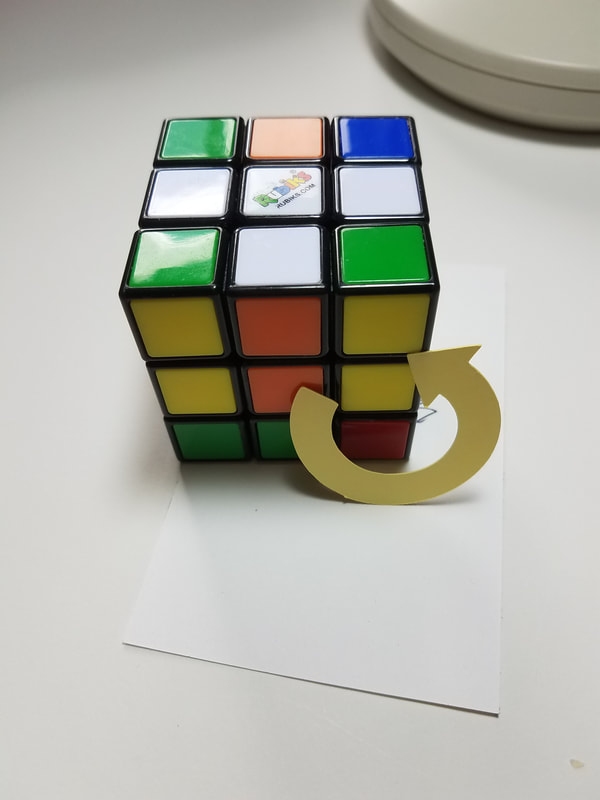
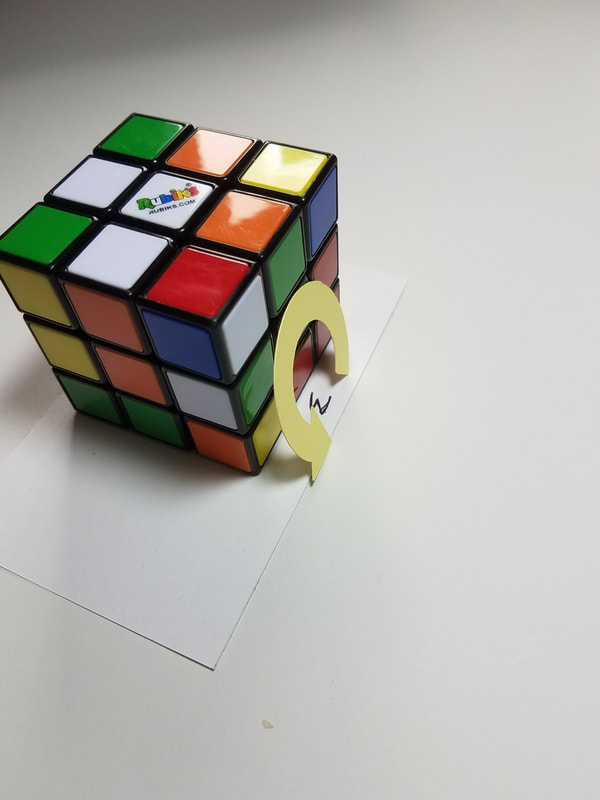
Now studying the photo below, note where the other three white edges are as we have to choose the next one to place where it belongs on top. Note I wrote a W next to one of the red edges, on the top face, as you cannot see that it is one of our white edges and an O next to that white edge in the middle layer as the white/orange edge is another one and finally a W next to the Green edge you can see on the bottom layer so that where our three white edges are now. You really only have to find any one of the white edges at a time when you solve the cube and not waste your time looking for all the rest but I'm doing it this way as you are learning how to solve the cube for the first time.
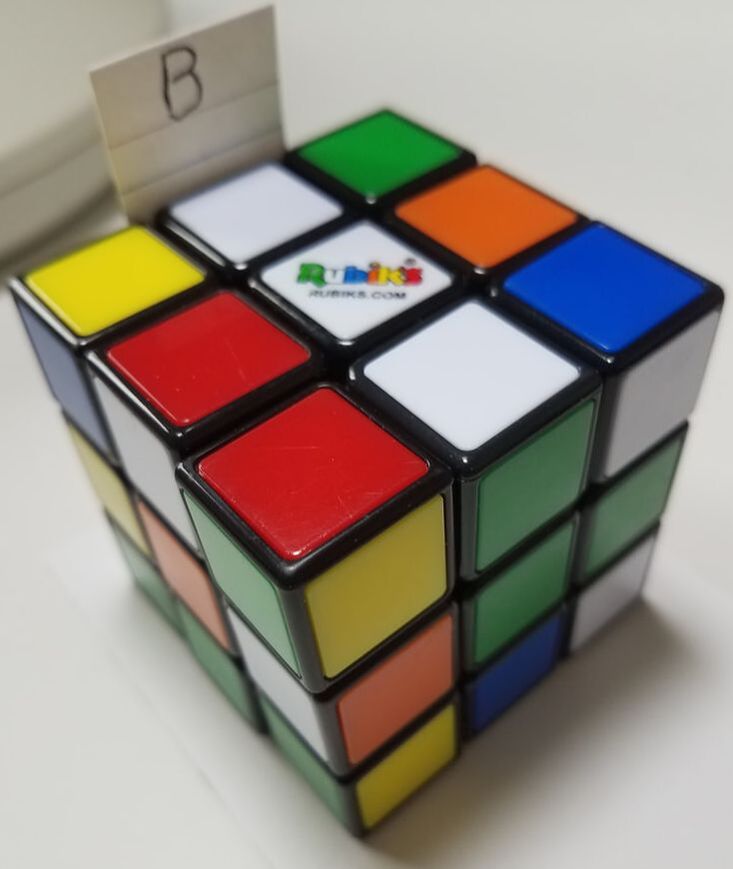
Since the top explanation of the step 1 process says your goal is to place a white edge in the bottom layer, let's take that green/white edge that is already on the bottom layer next.
OK, Alisson, what color is opposite that blue center color you can see in the photo below? You are right, the Green center is opposite the Blue center face. So how can we turn a face on the cube to place that green/white edge on the bottom layer on the green center face? Yep, you can either spin the bottom layer once counterclockwise or the bottom layer three times (270 degrees) clockwise. I don't know about you but I'd prefer turning the bottom layer counterclockwise once so that's what I'll do and then take another photo after turning the whole cube (so the green face is our new front face) so we can see the result. Skip to the next photo down.
Side Note: Allison, understand that the reason we can work with the bottom face is that we have one edge done on the top face and don't wish to lose the white/blue edge, you see in place, on top, in the back of the top face of the photo below as turning the bottom face does not effect anything on top. Get it?
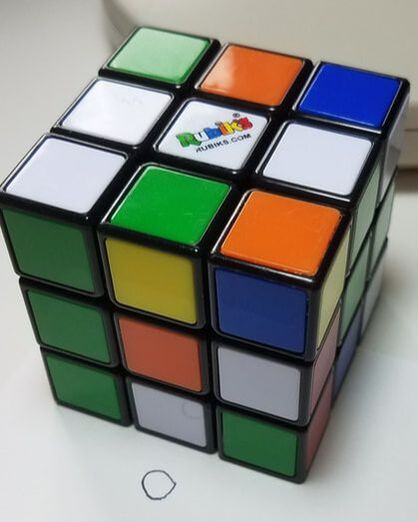
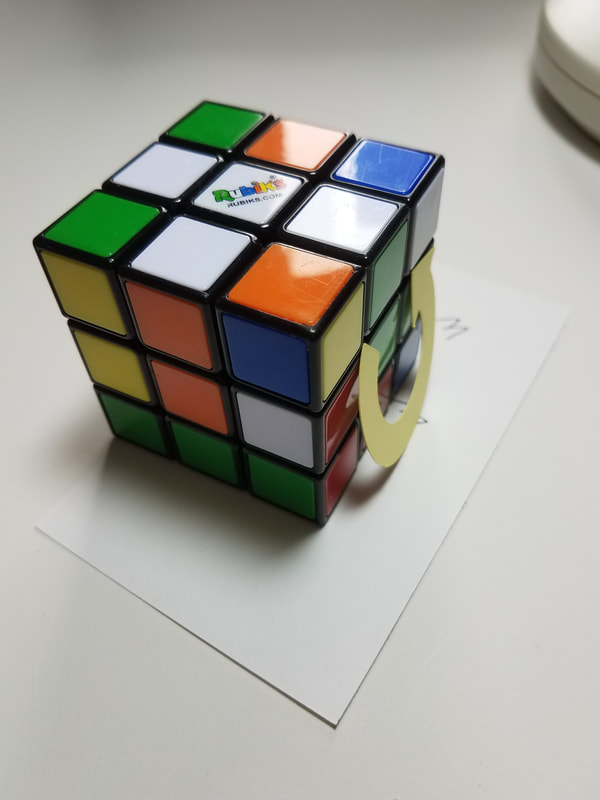
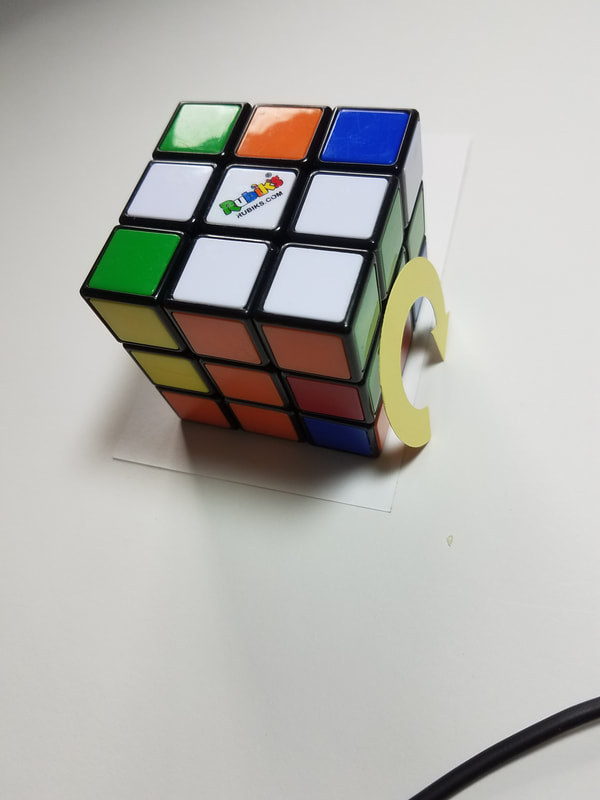
Now we are ignoring that white/red edge on top and the orange/white edge in the middle layer as we concentrate on that green/white edge that we just moved to the correct green centered face and turned the whole cube thus making that green face the front face.
According to step 5 above we have case 1 of the two possible cases, in that, the green of the green/white face is adjacent (next to) the green center face so we can simply 1 1 or F F or 1^2 or F^2 (spin the front face either direction 180 degrees) to place our 2nd white edge cube in place. The next photo will show the result. Skip to next photo down.
Noticing the photo below, we are half done with step 1 as we have two of the four white edges in place (half the white face cross).
Now we have to decide whether to go for the red/white edge on the top face or the orange/white edge on the middle layer? It really doesn't matter as they both have to be done. Let's do the orange/white edge in the middle layer next. Notice we can achieve moving the orange/white edge to the bottom layer in two ways. 1). If we turn the front face (green center face) counterclockwise one turn or 1' or F' the orange/white edge will be on the bottom layer with the white on the bottom followed by turning the bottom layer counterclockwise one turn to have the orange of the orange/white edge right under the orange center but we'll have to remember to turn the front face back clockwise one turn to return our white/green edge back to where it was so we don't lose it. Or, we can turn the left face (the orange centered face) clockwise one turn thus 4 or L to place the white/orange edge on the bottom layer and doing so will not mess up our white/green edge that is already done but then we'll have case 2 in step 5 above which would be good practice for us anyway. So, I will choose for you and choose to turn the Left face clockwise one turn, 4 or L, as to not move the two white edges we already completed and take another photo before we continue. Note next photo.
Now we have to decide whether to go for the red/white edge on the top face or the orange/white edge on the middle layer? It really doesn't matter as they both have to be done. Let's do the orange/white edge in the middle layer next. Notice we can achieve moving the orange/white edge to the bottom layer in two ways. 1). If we turn the front face (green center face) counterclockwise one turn or 1' or F' the orange/white edge will be on the bottom layer with the white on the bottom followed by turning the bottom layer counterclockwise one turn to have the orange of the orange/white edge right under the orange center but we'll have to remember to turn the front face back clockwise one turn to return our white/green edge back to where it was so we don't lose it. Or, we can turn the left face (the orange centered face) clockwise one turn thus 4 or L to place the white/orange edge on the bottom layer and doing so will not mess up our white/green edge that is already done but then we'll have case 2 in step 5 above which would be good practice for us anyway. So, I will choose for you and choose to turn the Left face clockwise one turn, 4 or L, as to not move the two white edges we already completed and take another photo before we continue. Note next photo.
Note the O written on near the white edge on the bottom as that is where our white/orange edge we are targeting now ended up. Note at the top of this page, that this is now the 2nd case of the two possibilities (when you move a white edge to the bottom face under the face whose center matches the 2nd color on the white edge). In this 2nd case orange/white edge is under the orange center face. Turn the whole cube now so the orange center face is the front face instead of the Left face and note next photo.
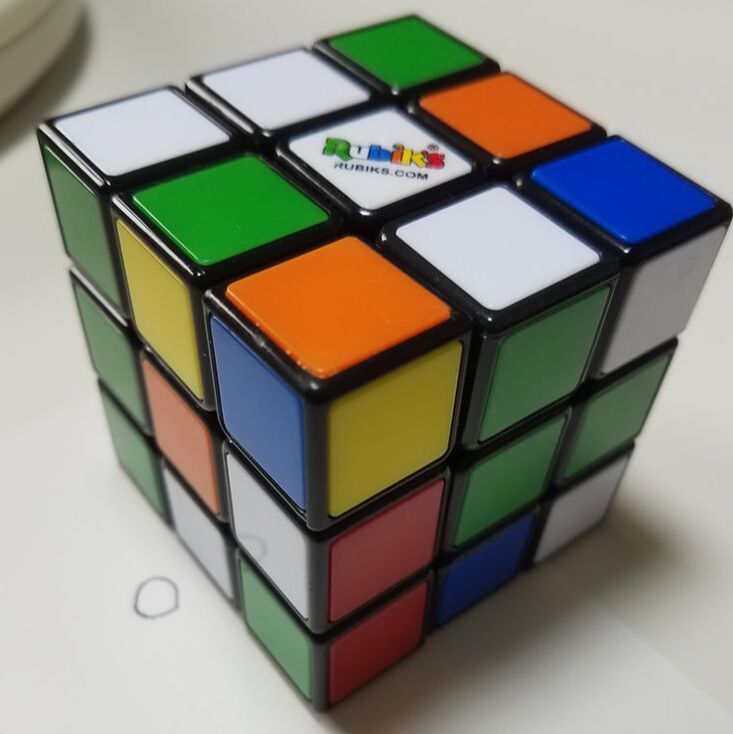
Allison, it's worth this extra photo below step as this is the 2nd of the two cases (in step 5 at the top of this page) that you haven't seen yet. Now, the orange/white face is below the orange center but the orange cannot be seen as it is on the bottom and the white side of the white/orange face is next to the orange center. The formula for this is 6 or B followed by 3 or R followed by 1' or F' to get the white/orange edge into the correct place but notice you have to remember to 3' or R' to return our white/green cube back to where it belongs. Note the next photos show each of these three turns followed by the fourth turn to return our white/green edge back to the top.
Upper left photo: Note that after 6 or B that the white/orange edge went from under the orange center to under the green center face temporarily. In the middle photo after 3 or R now the orange of the white/orange edge is just to the right of the orange center which was our goal to get the two oranges next to each other. The upper right photo then has already showed the result of the 3rd turn 1' or F' to move that white/orange edge to the top layer in the correct orientation so it is complete. The final photo on the bottom shows doing the 3' or R' counterclockwise turn to return our white/green edge to the top layer which took with it our final White/Red edge which now sits in the middle layer.
Side Note: Allison, realize where we are at now... we have 3 of the 4 white edge cubes in place and only have the white/red edge to complete the White Cross thus Step 1.
Let's analyze how we could achieve getting the white/red edge done. Remember, we need to place it on the bottom layer first without losing the three white edges we have done on the top layer already. There are two ways to do this:
1). we could 3' or R' which would place the white of the white/red edge on the bottom (which I like as I prefer case 1 in step 5 to case 2)
2). or we could 1 or F which would place the red on the white/red edge on the bottom (which is case 2 in step 5 above which complicates things by causing me to take more photos and the longer explanation to accomplish the task but would still get the job done either way. KISS (Keep It Simple Silly) means lets just do the 1). above so 3' or R'. Can you picture what happens when you do 3' or R'? That move places the white/red on the bottom layer under the green centered face so we'd 6 or B to spin the bottom layer so the white/red edge is on the red face (which is opposite the orange face in the last photo below) but now remember to 3 or R to return our white/green edge back to where it belongs. Note the following three photos below, shows all three of the above steps, one at a time. And then the fourth photo turns the whole cube 180 degrees so the red center is the front face instead of the orange center face being in front.
Upper left photo: We placed the white/red edge on the bottom by doing 3' or R' so see that W written under our counterclockwise arrow below? That's our white/red edge now but notice it took our white/green edge with it so the top center photo shows up after doing a 6 or B turn to move our white/red edge under the red center face (and out of the way) so now look at the photo on the upper right which is a 3 or R returning our white/green edge to where it was.
The bottom left photo shows turning the whole cube 180 degrees so the red center face is in front now instead of the orange centered face.
Now in the bottom left photo notice that we have case 1 of step 5 above again so we just 1 1 or F F turning the front 180 degrees (either way actually) to place our final white/red edge into place.
Thus the lower middle photo shows we successfully completed the White Cross and Step 1 is done, all four white edges are where they belong.
Now your homework Alisson is to mess the cube up again and redo step 1 over and over and over again until you are positive you have Step 1 down. My high school classes had to wait till the day after their next test to see step 2 so they had 1 to 2 weeks or more to practice step 1 daily before getting the opportunity to even see step 2.
Practice step 1 again, and again, and again, and again, .....
If you still cannot figure step 1 out from the above explanation let me know and we'll get together with your father or mother or grandmother and work out step 1 together but I hope this webpage page works for you as the rest of the world is not my neighbor and I hope they understand step 1 from the explanation of photos above.
See you in step 2 when I get around to getting it on my webpage.
