STEP 2
Finishing the White Face by Placing the Four Corners
Step 2 is both easier and harder, in that, it is easier to locate each corner as they only have eight places they can be (on the top or on the bottom as the middle only has edges) but harder because when you get the desired corner on the bottom row, under the spot it belongs, there are three possible cases, instead of two cases (like in step 1).
STEP 2
1. With the White center facing up and Step 1 (The White Cross, white edges in the correct places) complete
2. Look for a corner with white on one face, on the bottom layer first (as we can turn the bottom layer all we want without destroying what we've accomplished already on the Top layer)
3. Turn the bottom layer either direction until the corner you chose in step 2 above is directly under where that corner belongs on the top layer AND hold the cube so the desired location for this corner is corner at position #9 on the top face (the near right corner of the top). The Front Face (for the formula to work the front face is vital and will change which face is the front face throughout the solution) should have the white corner that you are trying to place in the bottom layer on the right, one of the non-white colors should be on your front face and the other non-white color on your corner should be in the center of the right face. Example: the corner with sides red, blue & white would be moved by turning the bottom layer only until it is on the bottom layer with red on one face and blue on the other face. Now, there exists only three cases:
Case 1). The white side is on the right face: (Side Note: Photos below show each turn of each case if that helps any)
6 1 6' 1' or B F B' F' is the formula you would use.
Side Note: It is common sense that you need to do 6 or B to temporarily move your corner off to the side while you twirl 1 or F down to place the corner it needs to go in place and then 6' or B' to place the desired corner where it belongs and finally 1' or F' to return the white edge and now white corner pieces back to the top layer. Watch as you do this step as then you will not need to memorize any formula for this step as it will just make sense to you.
Case 2). The white side is on the front face:
6' 3' 6 3 or B' R' B R is the formula you would use.
Side Note: It is common sense that you need to do 6' or B' to move your corner off to the left front side as on the next step 3' or R' will not effect the corner that you are trying to place but this move brings the top corner you wish it place it, to the bottom layer. Then 6 or B will place the desired cube in its correct position and finally 3 or R will return the white edge & now the new corner back to the top layer where they belong. Again, watch as you do this step as then you will not need to memorize any formula for this step either.
Case 3). The white side is on the bottom face:
1 6' 1' 6 6 or F B' F' B B will place the cube back where it was but now it is case 2 above OR
3' 6 3 6' 6' or R' B R B' B' will place the cube back where it was but now it is case 1 above (Your choice.)
Side Note: This case obviously takes much more time and if the cube is on the top layer where you have a choice of two ways with a 1 (F) or 3' (R') to place it on the bottom layer, avoid this case at all cost.
Watch again as you do either of the above for case 3 as your first turn either 1 or 3' keeps your desired corner on the bottom layer but rotates the white from facing the bottom so turning the bottom just moves your desired cube out of the way but keeps it in the bottom layer so after you do the 1' or 3 to return your top layer white pieces back where they belong, you can swing your corner back under where it use to be and do either case 1 or 2 to solve it now.
Both Steps 1 & 2 should make common sense after a short period of time so no need to memorize the formulas.
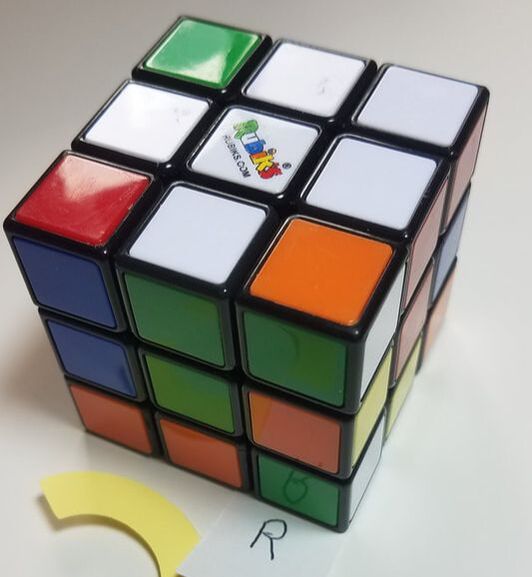
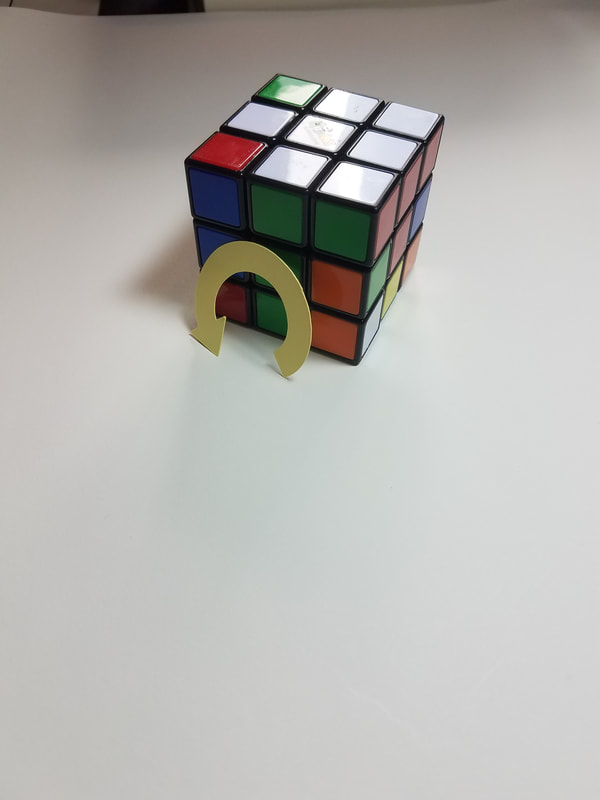
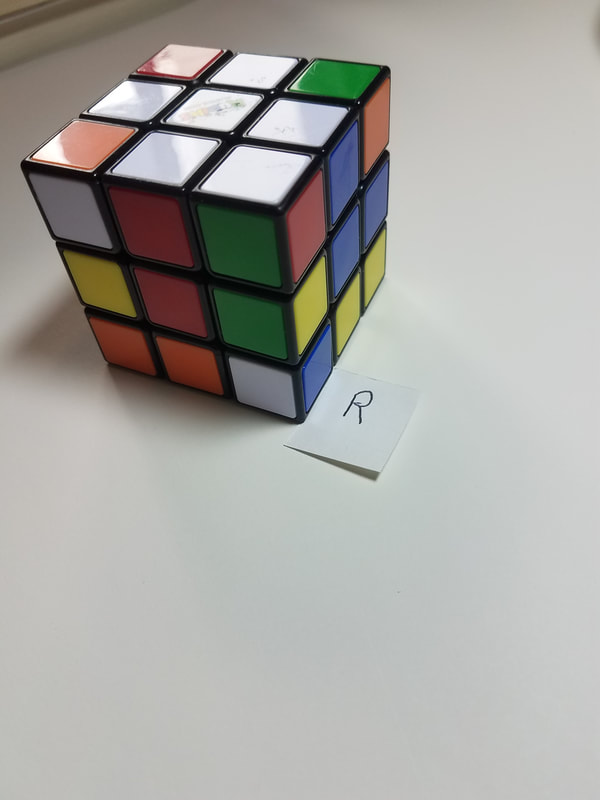
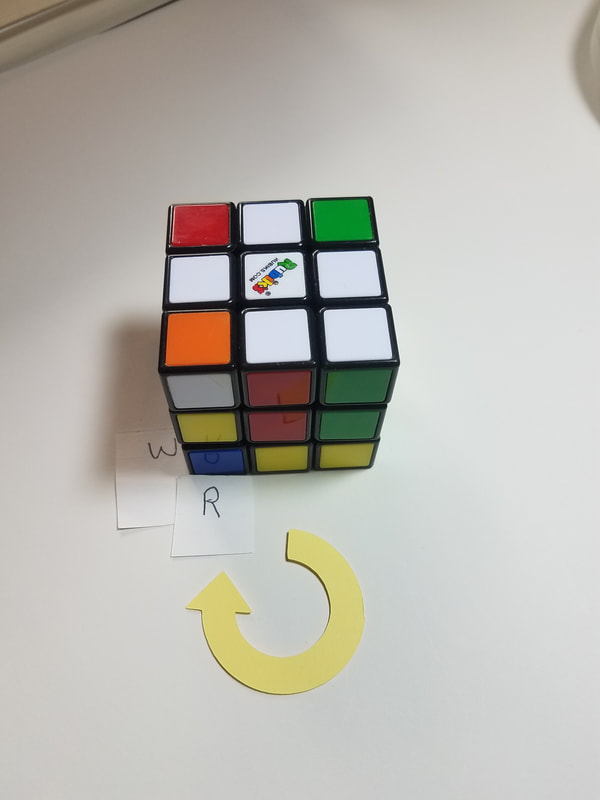
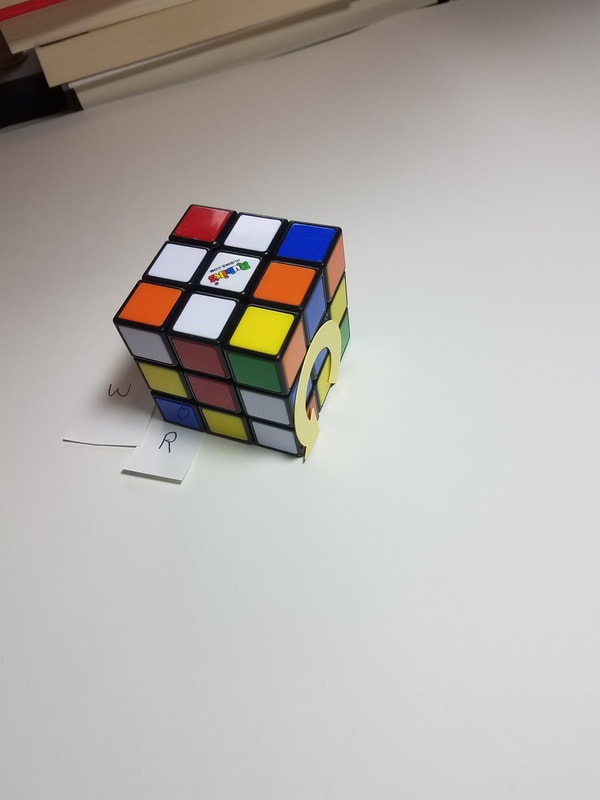
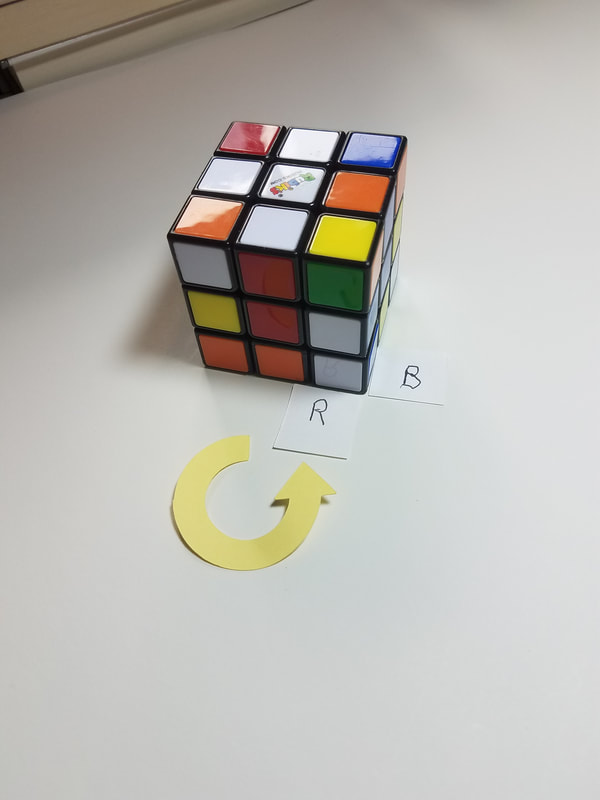
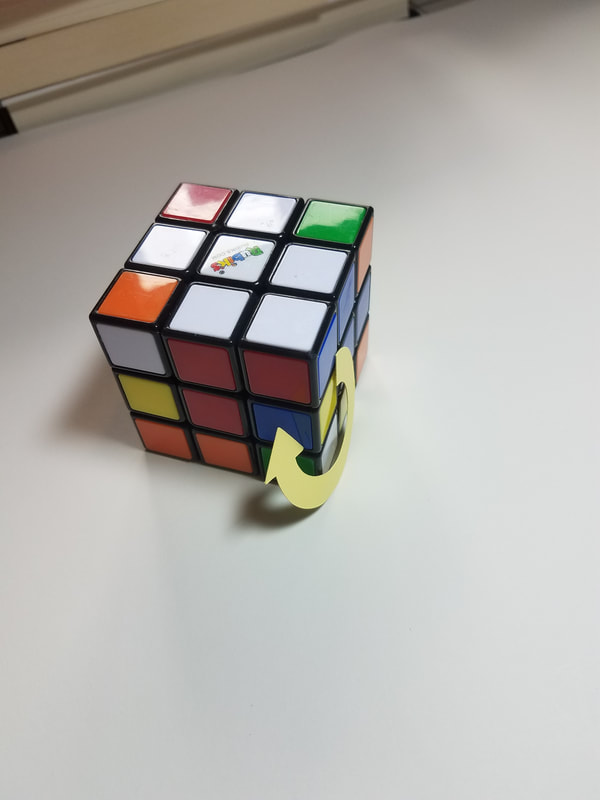
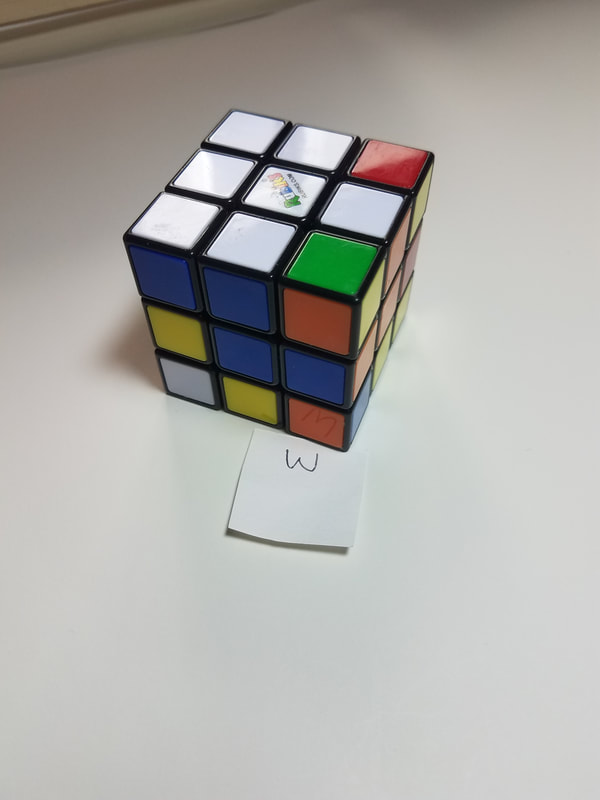
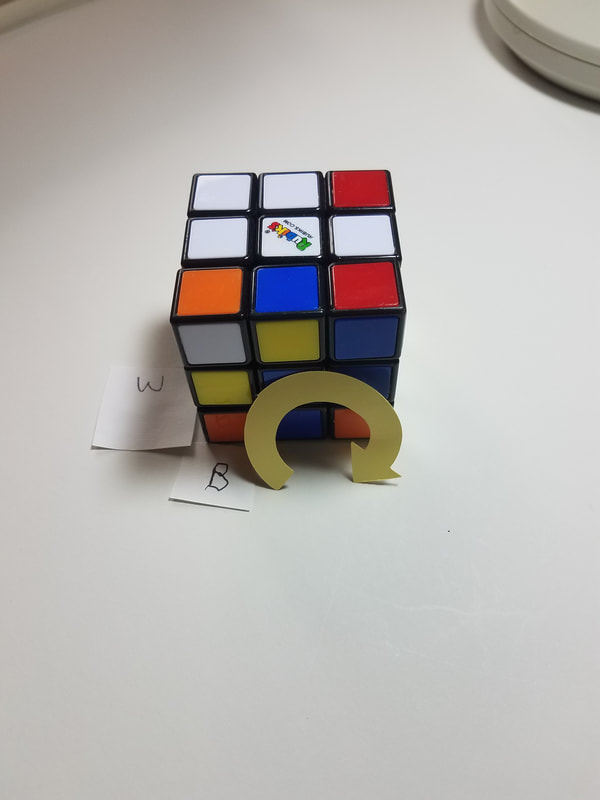
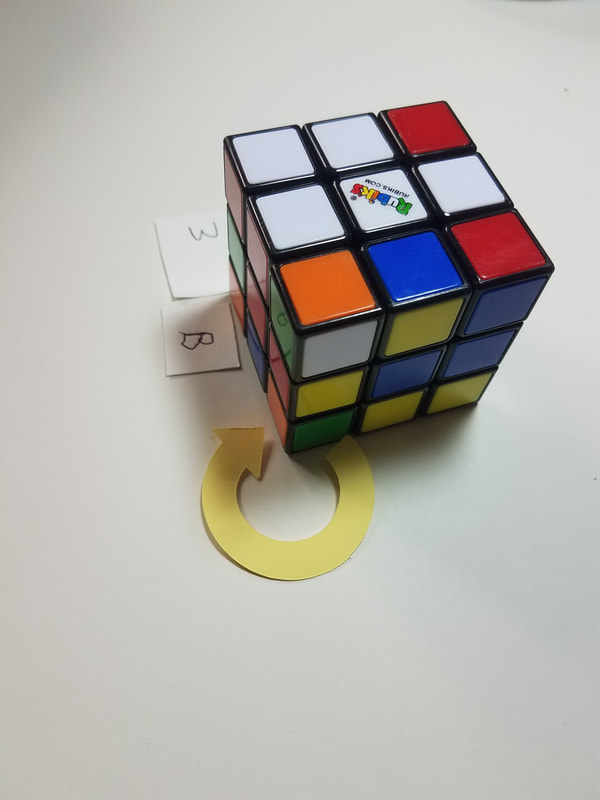
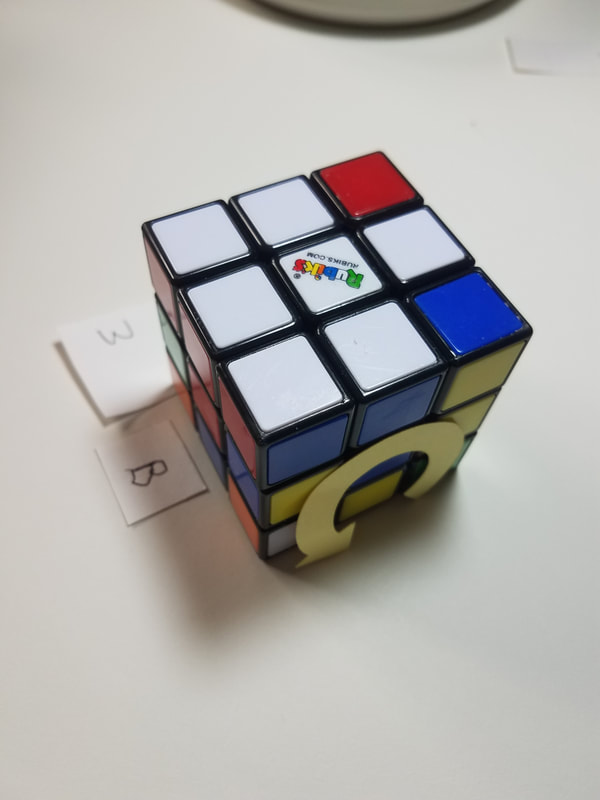
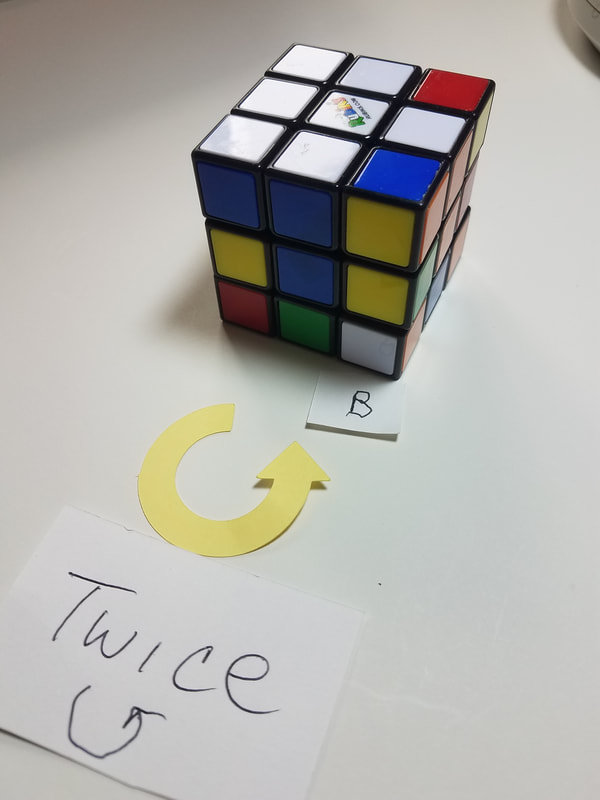
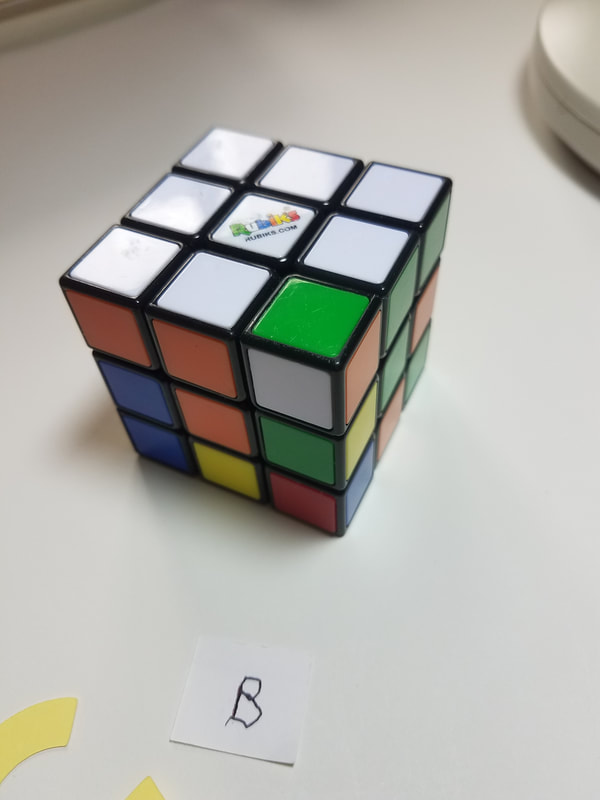
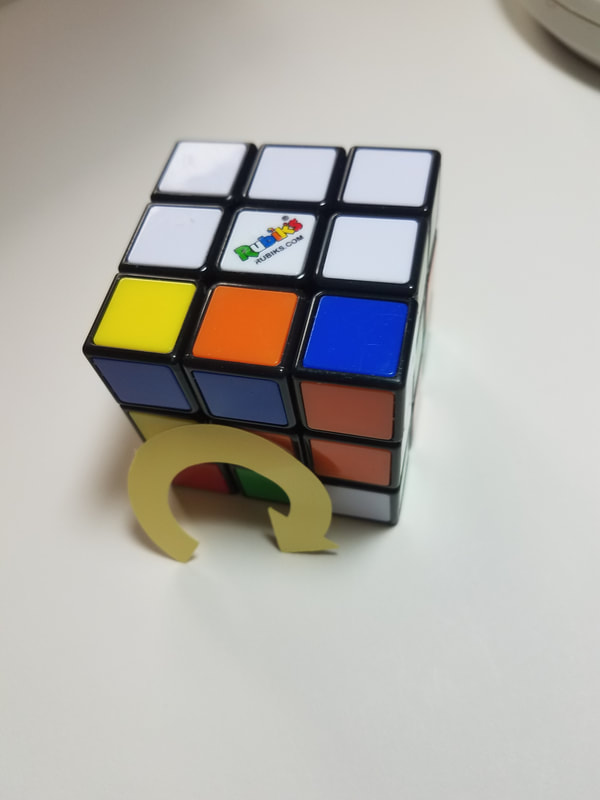
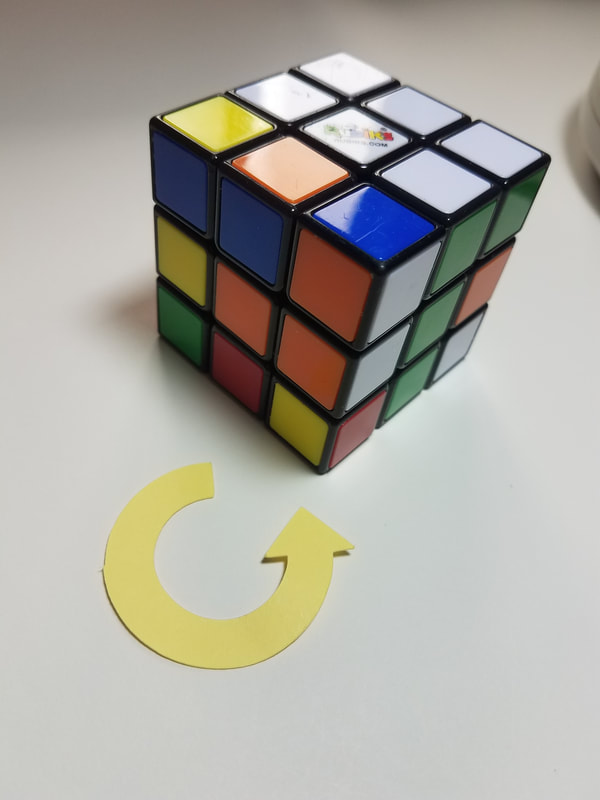
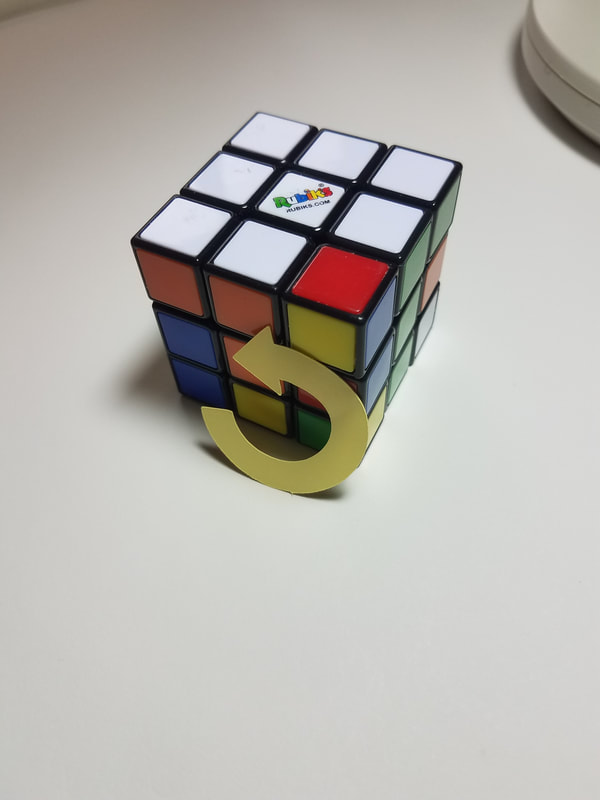
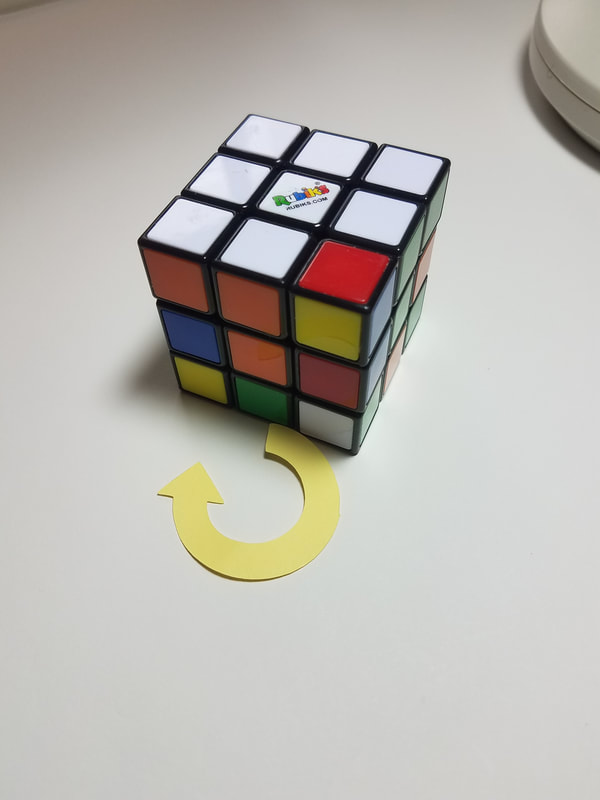
Step 2 Case 1 The white side is on the right side (Photos for formula)
Note the R on the paper means the Red is on the bottom and cannot be seen so this corner is white/green/red and is under top position #9 where it belongs and since the white is facing the right side, I called this case 1.
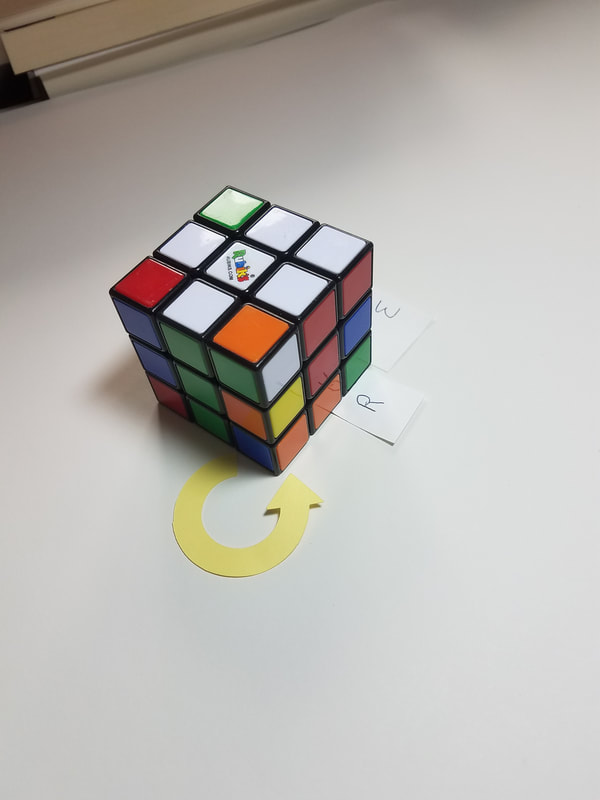
Step 2 Case 1 upper rt photo shows 6 or B to get our white/green/red corner out of the way
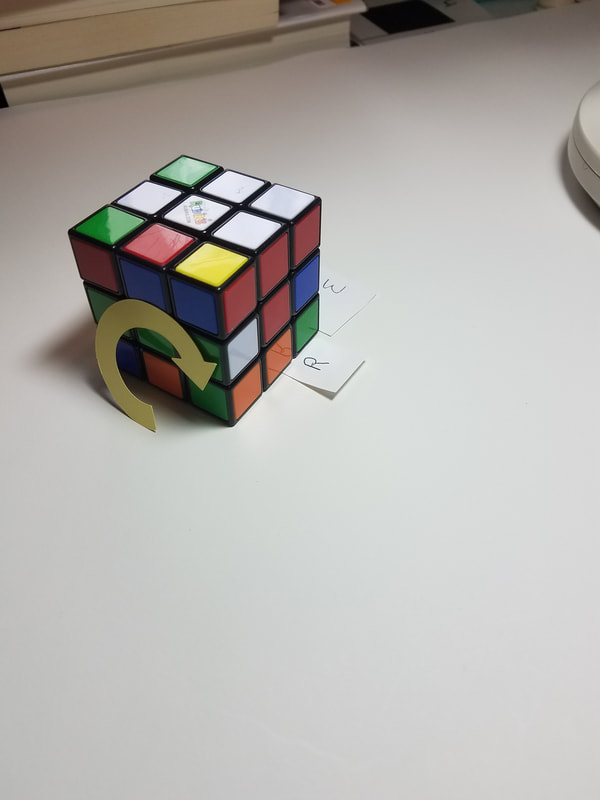
Step 2 Case 1 upper middle photo shows 1 or F to get the upper rt position into place to return the correct corner to it
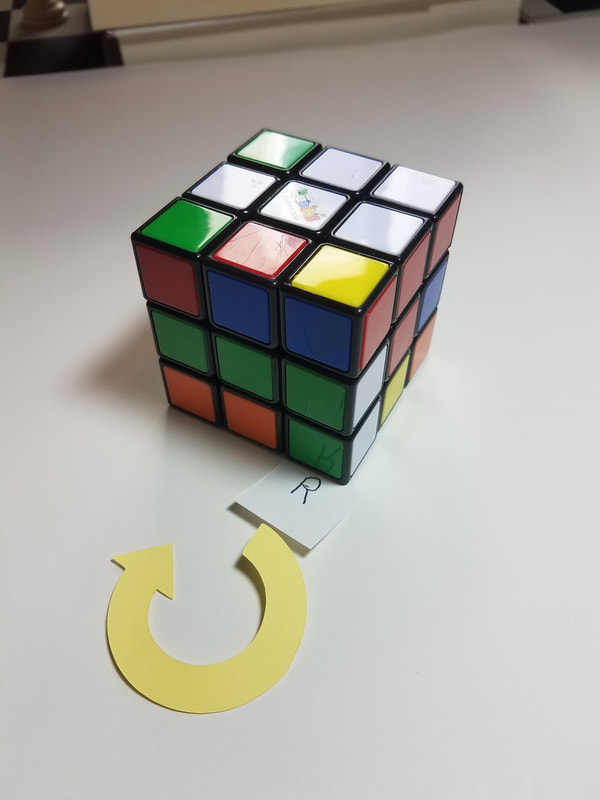
Step 2 Case 1 upper right photo shows 6' or B' to return our correct corner to the place it belongs next to white edge
Step 2 Case 1 lower left photo shows 1' or F' to take our white cubes back to the top layer where they belong
Step 2 Case 2 upper right photo shows the White/Blue/Red cube under position #9 on top with white facing front
Step 2 Case 2 upper middle photo shows first turn 6' or B' to move our corner off to the side
Step 2 Case 2 upper right photo shows second turn 3' or R' to bring top corner into place where our cube belongs. Note our White/Blue/Red cube has not moved so is still in the lower left of bottom (Go under photo to cont.)
Step 2 Case 2 the lower left photo in above photo shows the move 6 or B to place our desired corner where it belongs next to the white edge piece
Step 2 Case 2 the lower middle photo in above photo shows the move 3 or R to return our white pieces to the top where they belong
Step 2 Case 2 the lower middle photo in above photo shows the move 3 or R to return our white pieces to the top where they belong
Step 2 Case 3 upper right photo shows the white/orange/blue corner with white on the bottom so hidden
Step 2 Case 3 upper middle photo shows 1st move 1 or F so now white is not on the bottom but facing left and in lower left corner on bottom of cube
Step 2 Case 3 upper right photo shows 2nd move 6' or B' to get our corner out of the way temporarily
Step 2 Case 3 lower right photo shows 3rd move 1' or F' to move our already done white pieces to the top layer
Step 2 Case 3 lower middle photo shows the last move 6 6 or B B (two bottom clockwise turns) to return our corner cube to its original position BUT NOW the white face IS NOT facing the bottom so it's case 1 or 2 above.
YEP the formula for Case 3 is just for getting the white side to face front or right instead of down so you still need to do case 1 or 2 above (case 2 as the white is facing front)
What if one of the corners you need is on the top face?
Upper left photo shows this possibility. Note that you handle these last as doing the bottom corners first might automatically bring a top corner to the bottom face as you do the above cases.
step 1 still noting the top left photo, study it for awhile. Note if you 3' or R' the white face of the position #9 cube would place the white face of the white/green/orange corner facing the bottom or case 3 and you don't want that. So, notice that you can 1 or F which is the top middle photo so now the white face is case 2.
step 2 6 or B temporarily moves your corner cube out of the way in the top right photo
step 3 the lower left photo shows that now it is safe to 1' or F' move the top white pieces back to the top layer
step 4 6' or B' now moves the desired cube back under the position #9 on top where it belongs so now you can do the steps in case 2 to solve this situation.
YEP, all these steps were needed just to get the corner on the bottom layer without destroying what you've achieved on the top layer.
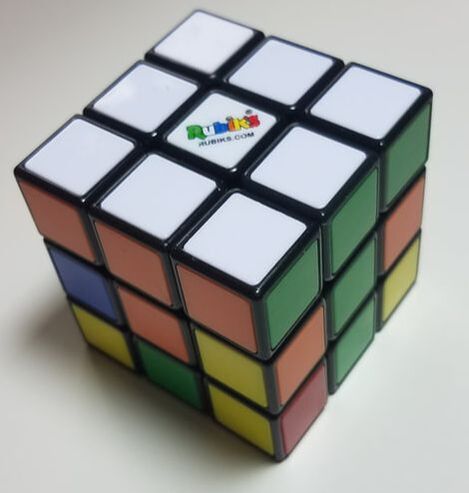
Step 2 is complete in photo below.
All the pieces with white on them are in the correct place. One layer compete and only the middle and lower layer left.
Now mess up the cube and do Steps 1 and 2 over and over and over and over again until you can picture them in your sleep and you may not even have to look at the cube as you do the correct moves for each step and case. Feel confident with steps 1 & 2 before starting step 3
Steps 1 and 2 are hard because they are wordy to explain but are the only steps I find to be common sense.
Steps 3-7 will be much easier to explain (less wordy) but the formulas have to be committed to memory. That's where I prefer the formulas to be #'s and not letters as the #'s I can remember years later where the letter formulas I forget easily.
Steps 3-7 will be much easier to explain (less wordy) but the formulas have to be committed to memory. That's where I prefer the formulas to be #'s and not letters as the #'s I can remember years later where the letter formulas I forget easily.
